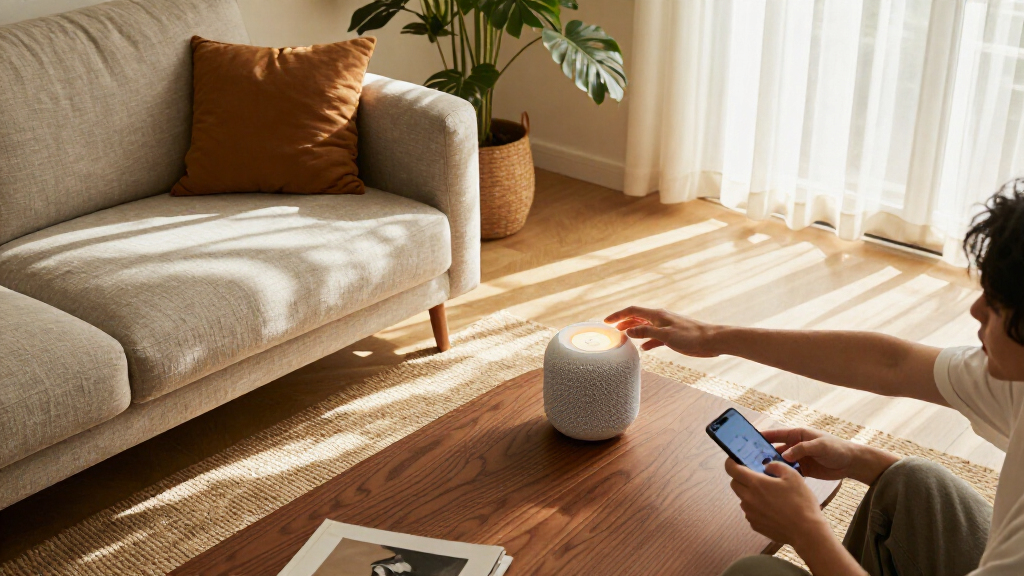

Set up smart devices in your living room so you can control lighting, entertainment equipment, and other compatible appliances from an app, voice assistant, or physical control. This guide is for beginners planning a small, practical setup, such as smart bulbs, a smart plug, and a speaker or display. Allow 1-2 hours, plus extra time if you need to update your router or install a hub. You will finish with devices connected, basic controls tested, and a simple routine ready to use.

Get furniture and decor delivered free with Prime
- Fast, free delivery on millions of items
- Prime Video, Amazon Music and more included
- Member-only deals all year

Amazon Echo Dot Max Smart Speaker with Alexa, Graphite
- ✔ Dimensions: 4.27 × 4.27 × 3.9 in
- ✔ Weight: 17.82 oz
- ✔ Drivers: 1 × 0.8 in tweeter; 1 × 2.5 in woofer
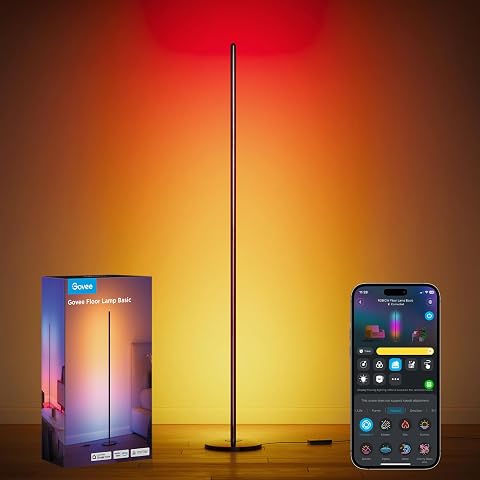
Govee RGBIC Floor Lamp Basic, 1,000-Lumen LED Corner Lamp
- ✔ Height: 53.7 in
- ✔ Maximum brightness: 1,000 lumens
- ✔ Wattage: 24 W

Blink Mini 2K+ Indoor Security Camera, Black
- ✔ Camera resolution: 2K (2560 × 1440)
- ✔ Field of view: 138° diagonal
- ✔ Zoom: Up to 4×
Difficulty: Beginner | Time: 1-2 hours
What You’ll Need
Tools & Materials:
- A smartphone or tablet with access to the device maker’s app store
- Living room devices and their power supplies
- Wi-Fi network name and password
- A smart speaker, display, or hub if your chosen devices need one
- A step stool or lamp switch access if you are installing bulbs
Knowledge:
- Basic ability to install an app and join a Wi-Fi network
- Ability to use the home router’s network settings if needed
Check each device’s network requirements before buying. Some devices use only 2.4 GHz Wi-Fi, while others support 5 GHz, Thread, or a hub. Keep the product labels and setup codes nearby. Do not buy devices solely because they share a brand name; confirm that they work with the same app, assistant, or smart home standard.
Amazon Echo Dot Max Smart Speaker with Alexa, Graphite
The Echo Dot Max earns the top position because it can anchor several parts of a living room at once: music and spoken audio, Alexa voice control, and connections to compatible smart home devices. Its two-way mono speaker pairs a tweeter with a woofer, and automatic room adaptation is intended to adjust playback to the space. The stated bass improvement over the Echo Dot (2026 release) gives it a stronger audio case than a basic voice assistant, though a single speaker still produces mono playback.Its hub is the bigger differentiator from the Govee lamp and Blink camera. Zigbee, Matter, and Thread support can let compatible lights, sensors, and other devices connect through one living room device, while presence and temperature sensors can support routines. The Govee is more specialized if color effects are your priority, and the Blink is the relevant choice when you want a camera. Neither offers the Echo’s combination of sound and smart home coordination.There are dependencies to consider. The built-in eero extension needs a compatible eero router, account linking, and the eero app; it supports up to 10 connected devices on the 5 GHz band. Bluetooth speakers requiring PIN codes are unsupported. We’d choose this model for a voice-controlled living room hub, but skip it if you want stereo sound from one unit or don’t plan to use Alexa or compatible smart home devices.
Pros:
- Room-adaptive playback and a dedicated woofer for fuller sound than a basic voice assistant speaker.
- Built-in Zigbee, Matter, and Thread support for compatible devices.
- Presence and temperature sensors can trigger living room routines.
- Microphone disable button and multiple privacy controls.
Cons:
- The eero extension depends on a compatible eero router, account linking, and the eero app.
- The extension supports up to 10 connected devices in the 5 GHz band.
- Bluetooth speakers that require PIN codes are not supported.
Best for: Households that want one living room device for Alexa, everyday audio, and connecting compatible smart home gear.
Not ideal for: Listeners who need stereo playback from a single speaker, or buyers who will not use Alexa or its smart home features.
Bottom line: We recommend the Echo Dot Max as the most capable starting point for a living room that needs both voice-led audio and broader smart home control.
“We recommend the Echo Dot Max as the most capable starting point for a living room that needs both voice-led audio and broader smart home control.”
Govee RGBIC Floor Lamp Basic, 1,000-Lumen LED Corner Lamp
Where the Echo Dot Max organizes a room’s smart devices, the Govee RGBIC Floor Lamp Basic changes how the room looks. At 53.7 inches tall, it is designed to stand in a corner or small space, and its RGBIC lighting supports millions of colors and 85 dynamic scene modes. Music and gaming audio sync can make it a better fit for an entertainment setup than a conventional floor lamp, especially when color effects matter as much as general illumination.The lamp is the clearest choice in this trio for decorative, app-controlled lighting. The Echo has an ambient-light sensor and can coordinate compatible smart home devices, but it is not a dedicated multicolor floor lamp. Blink, meanwhile, provides monitoring rather than room lighting. Buyers should also distinguish colorful accent effects from a full lighting plan: the listed maximum brightness is 1,000 lumens, and the lamp is a single corded fixture rather than a whole-room lighting system.Control is through the Govee Home app or compatible Alexa and Google Assistant voice control. The practical catch is that Wi-Fi is limited to 2.4 GHz, and no remote is included, so app access or voice control is part of the intended setup. It is also for indoor use. Choose it when visual atmosphere is your priority; skip it if you want a general-purpose smart home hub, a camera, or simple controls without relying on an app.
Pros:
- RGBIC effects offer customizable multicolor lighting.
- 85 dynamic scene modes provide varied lighting looks.
- Music and gaming audio synchronization suits entertainment spaces.
- App and compatible Alexa or Google Assistant voice control.
Cons:
- Connects over 2.4 GHz Wi-Fi only.
- A remote control is not included.
- Not water resistant and intended for indoor use.
Best for: Living rooms, gaming corners, or media spaces where customizable color scenes and music sync are a priority.
Not ideal for: Buyers seeking a smart home hub, a room-monitoring camera, a handheld remote, or lighting for outdoor use.
Bottom line: Choose the Govee when a dedicated, colorful corner light will improve the room more than an all-purpose speaker or camera.
“Choose the Govee when a dedicated, colorful corner light will improve the room more than an all-purpose speaker or camera.”
Blink Mini 2K+ Indoor Security Camera, Black
The Blink Mini 2K+ is the only option here built to monitor a living room. Its 2K video, 138-degree diagonal field of view, and up to 4x zoom give it more room coverage detail than a general-purpose smart speaker or lamp can provide. Night vision and two-way audio with noise cancellation add useful capabilities for checking in on a space and speaking through the camera. Its compact body and included stand and mounting kit make placement more flexible than a larger camera.Compared with the Echo Dot Max, Blink is a focused security accessory rather than a central smart home device. It works with Alexa and can act as a plug-in doorbell chime, but it does not list a built-in hub for connecting Zigbee, Matter, or Thread devices. The Govee is the better fit when the goal is ambience; Blink makes sense when seeing or speaking into the room is the primary need. Its 2.4 GHz Wi-Fi connection is also more limited than the Echo’s Wi-Fi 6E support.We’d factor in setup and ongoing feature needs before choosing it. The camera needs a power outlet and indoor adapter, while person and vehicle detection and cloud storage require an optional subscription. Outdoor use calls for a separately sold weather-resistant power adapter. That makes Blink a good fit for a fixed indoor view, but a poor match for a cable-free placement or buyers who want all detection and storage features without a subscription.
Pros:
- 2K video with a 138° diagonal field of view and up to 4x zoom.
- Two-way audio includes noise cancellation.
- Compact camera includes a stand and mounting screws.
- Works with Alexa and can act as a plug-in doorbell chime.
Cons:
- Requires a power outlet and indoor adapter.
- Person and vehicle detection and cloud storage require an optional subscription.
- Outdoor use requires a separately sold weather-resistant power adapter.
Best for: Households that want a compact, plug-in camera to check a living room and use two-way audio with Alexa compatibility.
Not ideal for: Buyers who need a wireless camera, want outdoor use without extra equipment, or require person and vehicle detection or cloud storage without a subscription.
Bottom line: The Blink Mini 2K+ is the right specialist pick when living room monitoring matters more than lighting effects or a broad smart home hub.
“The Blink Mini 2K+ is the right specialist pick when living room monitoring matters more than lighting effects or a broad smart home hub.”
As an Amazon Associate we earn from qualifying purchases.
Before You Start
Choose what you want to control before you start: for example, a floor lamp, the main lights, or a television and sound system. Check that the devices are suitable for the equipment you will connect. A smart plug must match the appliance’s electrical rating, and it should not be used for high-power heaters or other loads unless the plug maker specifically permits it. Never use a smart plug to control equipment that must not be switched off unexpectedly.
Place your phone on the same home network you plan to use for setup. If the router combines 2.4 GHz and 5 GHz networks, follow the device maker’s instructions; some setup processes require the phone and device to use 2.4 GHz. Keep existing wall switches accessible, since many smart bulbs lose power when a switch is turned off.
Step-by-Step Instructions
Step 1: Choose the first devices
Write down the living room tasks you want to automate, then select only the devices needed for them. A useful starter setup might include smart bulbs for one or two lamps, a smart plug for a compatible lamp, and a speaker or display for voice control. Check the app, Wi-Fi, hub, and smart home compatibility listed for each product before purchase.
Start with devices that solve a clear need. For example, choose dimmable bulbs if you want a movie setting, or a smart plug if you want to schedule a lamp that uses a regular bulb. Avoid buying several devices before you confirm that the first one works in your room and with your network.
Tip: A smart plug controls power only. It cannot dim a lamp or change a regular bulb’s color.
Check: You have a short device list, and each item’s app, network, and hub requirements match your planned setup.
Step 2: Check the room and network
Look at where each device will go and confirm that it has a nearby outlet, usable Wi-Fi signal, and clear access to any controls you need. Keep plugs and power supplies away from rugs, curtains, and places where furniture could press on them. Check Wi-Fi in the intended device locations using your phone; a weak or unstable connection can cause delays or failed setup.
Confirm that the router is working and that you know the Wi-Fi password. If the signal is poor in the living room, move the router or consider an appropriate mesh node before adding devices. Do not place a hub inside a closed cabinet if its maker recommends open placement.
Tip: A phone showing Wi-Fi bars does not guarantee a stable connection. Check whether pages load quickly in the exact spot where the device will sit.
Check: The intended locations have power, a usable network signal, and enough clearance for safe installation.
Step 3: Install the device maker’s app
Download the official app for your first device from your phone’s app store. Create or sign in to the required account, then allow only the permissions needed for setup and operation. Read the device’s quick-start instructions and keep any QR code or setup code within reach.
If you plan to use a separate smart home app or voice assistant, install it as well, but first add the device through its maker’s app when the instructions call for that order. Do not reset a device that is already configured unless you are ready to repeat setup.
Tip: Use the manufacturer’s exact app name from the package or official support page; search results can include unrelated apps.
Check: The official app opens, your account is ready, and the setup instructions and device code are available.
Step 4: Add one device at a time
Power on one device and follow the app’s add-device instructions. Put the device into pairing mode using the button or switch sequence in its manual, then select the matching product in the app. Enter the Wi-Fi password carefully if requested. Wait for the app to report that setup is complete before moving on to the next device.
For a smart bulb, turn off the lamp before fitting the bulb, then restore power when it is seated. For a smart plug, insert it into the outlet first and connect a compatible lamp or appliance only after checking the plug’s rating. For a speaker or display, follow its own placement and account-linking instructions.
Tip: Pairing steps vary by model. Avoid repeatedly switching power or pressing buttons unless the instructions say to do so.
Check: The app lists the device as online, and its controls respond when you turn it on or off.
Step 5: Name devices by room and purpose
Assign each device to the living room in the app, then give it a short name that describes its location or function, such as “Reading lamp” or “Ceiling lights.” Use names that are easy to say and distinct from one another. If a device controls a whole group of bulbs, name the group rather than giving every bulb a confusingly similar label.
Keep the same room assignment and naming approach when linking devices to a smart home platform. This helps voice commands and routines target the correct equipment.
Tip: Avoid names that sound alike, such as “lamp one” and “lamp won.” Clear names reduce voice control errors.
Check: The app shows each device under the living room with a unique, recognizable name.
If you want voice control or a shared home dashboard, open the assistant or smart home app and add the device maker’s service or scan the device’s setup code, as directed. Link the account, select the living room, and allow the platform to discover the device. Place a speaker or display where you can hear it clearly, while keeping it away from sources of heat and liquid.
Give household members access through the platform’s household-sharing feature if they need control. Use the platform’s privacy settings to review voice history, microphone controls, and account access.
Tip: If the device maker’s app and assistant show different names, update the name in the platform you will use for voice commands.
Check: The device appears in the chosen shared control app, and a simple voice or app command works.
Step 7: Create and test one routine
Create one simple routine, such as “Movie time,” that dims compatible lights or turns off a lamp. Choose a clear trigger, such as a voice command or an app button, and add only actions that make sense together. Review the devices and settings before saving.
Run the routine while you are in the room. Check each device separately to confirm that the routine changed the intended settings. Keep a physical way to restore normal lighting, and avoid routines that could interrupt essential equipment or leave the room unsafe to walk through.
Tip: Start with a manual trigger. Add schedules or presence-based triggers only after you understand how the routine behaves.
Check: The routine runs from its chosen trigger and affects only the devices and settings you selected.
Step 8: Check everyday control and recovery
Test each device from its app, then test voice control if you connected an assistant. Turn a lamp off and on at its wall switch to learn how the device behaves after power is interrupted. Confirm that the physical switch remains accessible and that you can still use the room if the internet or app is unavailable.
Write down the device names, app used, and any hub location. Keep setup codes and manuals in a safe place. Install firmware updates offered during setup, then check the app once more to confirm that devices remain online.
Tip: Some smart bulbs need continuous power at the wall switch. Explain this to household members so they do not disable app control by switching them off.
Check: Every device responds as expected, the physical controls remain usable, and the apps show the devices online.
Common Mistakes to Avoid
- Buying devices before checking network or platform compatibility. — Read each product’s Wi-Fi, hub, app, and assistant requirements and confirm that they fit your existing setup.
- Turning off a wall switch that supplies power to a smart bulb. — Keep the switch on for normal use, label it if helpful, and control the bulb through its app, assistant, or compatible smart switch.
- Plugging a high-power or unsuitable appliance into a smart plug. — Compare the appliance’s electrical rating with the smart plug’s rating and follow both manufacturers’ restrictions.
- Creating a routine before confirming that each device works on its own. — Test each device individually first, then add one routine and check every action it performs.
Troubleshooting
Problem: The app cannot find a device during pairing.
Solution: Move your phone near the device, confirm that the device is powered, and restart pairing mode according to its manual. Check whether setup requires 2.4 GHz Wi-Fi, then retry with the correct network selected.
Problem: A device appears offline or responds slowly.
Solution: Check the router and device power, then test the Wi-Fi signal at the device’s location. Restart the device using its instructions. If it repeatedly disconnects, move it closer to the router or add suitable network coverage.
Problem: Voice commands control the wrong lamp or do not recognize a device.
Solution: Check that the device is linked to the assistant and assigned to the living room. Rename devices with short, distinct names, refresh device discovery, and try the command again.
Problem: A smart bulb stops responding after someone uses the wall switch.
Solution: Restore power at the switch and wait for the bulb to reconnect. Keep the switch on during regular use. If the bulb does not return, follow its app’s reconnection or reset instructions.
What Success Looks Like
Your living room devices appear online in their control app, have clear names, and respond to app commands. Any shared platform or voice assistant can reach the intended devices. Your test routine performs the selected actions, and you can still control lighting safely with accessible physical switches or other manual controls.
Next Steps
Use the setup for a few days before adding more devices. Note any slow responses, confusing names, or routine actions that do not fit your habits, then adjust them in the app. Review device and account updates periodically, and check privacy and household access settings when someone’s access changes. Add another device only when you have a specific task for it and have checked its compatibility with the system already in place. Keep product instructions and setup codes available in case you replace your router or need to reconnect a device.
Frequently Asked Questions
Do all smart home devices need Wi-Fi?
No. Some connect directly to Wi-Fi, while others use Bluetooth, Thread, or a separate hub. Check the product requirements and whether the needed hub is included or sold separately.
Can I use smart bulbs with an ordinary wall switch?
Usually, but switching off the wall control cuts power and can make the bulb unavailable in its app. Leave the switch on for routine use, or use a compatible smart switch designed for the bulbs.
Can a smart plug dim my living room lamp?
A standard smart plug switches power on or off; it does not dim. Use a compatible dimming bulb and control, and check the bulb and fixture requirements before installation.
Will the devices work if my internet goes down?
Behavior varies by device and platform. Some local controls or routines may continue through a hub, while remote app access and cloud voice features may stop. Check the maker’s offline-use details and keep physical controls available.
How many devices should I set up at once?
Start with one or two devices and confirm that setup, naming, and control work reliably. Add more after you know the network and apps handle the first devices well.