If your suction pool cleaner isn’t working properly, first check that your water level is at least halfway up the skimmer opening and that the skimmer basket isn’t clogged. Inspect the hose and suction lines for cracks or blockages, and make certain the cleaner is correctly attached and secured. Examine brushes and wheels for wear and listen for air leaks. Adjust float weights if needed and verify the pump and filter are functioning well. For more detailed steps, keep exploring these troubleshooting tips.
Key Takeaways
- Verify water level is adequate and skimmer basket is clear to ensure proper suction.
- Inspect and clean the hose, fittings, and suction lines for cracks, leaks, or blockages.
- Confirm the cleaner is correctly attached, and check all connections and electrical wiring.
- Examine brushes, wheels, and hoses for wear, debris, or leaks, replacing parts as needed.
- Submerge the hose and listen for leaks; adjust floats and weights to improve movement and suction.
Checking the Pool’s Water Level and Skimmer Basket
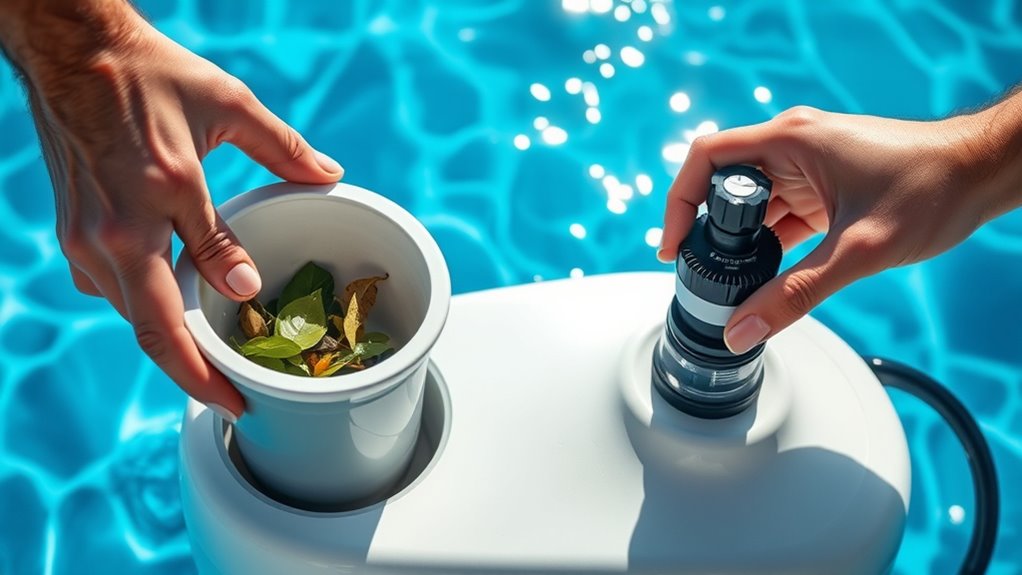
If your suction pool cleaner isn’t operating properly, the first step is to check the pool’s water level and skimmer basket. A low water level can disrupt proper suction, so make sure it’s at least halfway up the skimmer opening. Additionally, a clogged skimmer basket can restrict water flow, affecting cleaner performance. While inspecting, also verify that your pool has proper chemical balance. Maintaining the right pH and sanitizer levels helps prevent algae growth, which can clog or impair the cleaner’s operation. Algae buildup not only impacts water clarity but can also cause debris to stick to the cleaner, reducing efficiency. Regularly checking these elements ensures your pool remains balanced and clean, giving your suction cleaner the best chance to function smoothly and effectively. Ensuring your water chemistry is within recommended parameters can also help optimize pool equipment performance.
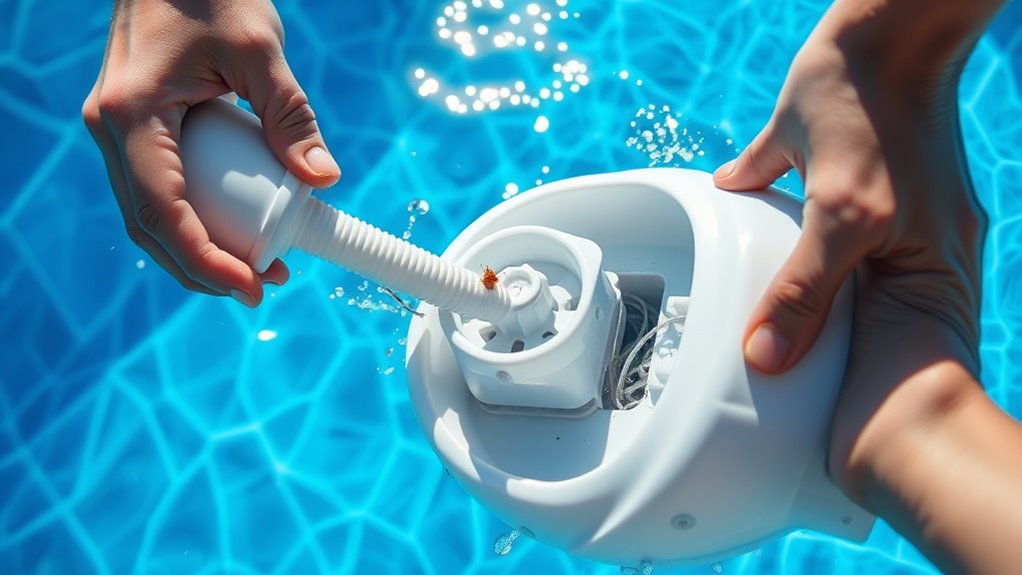
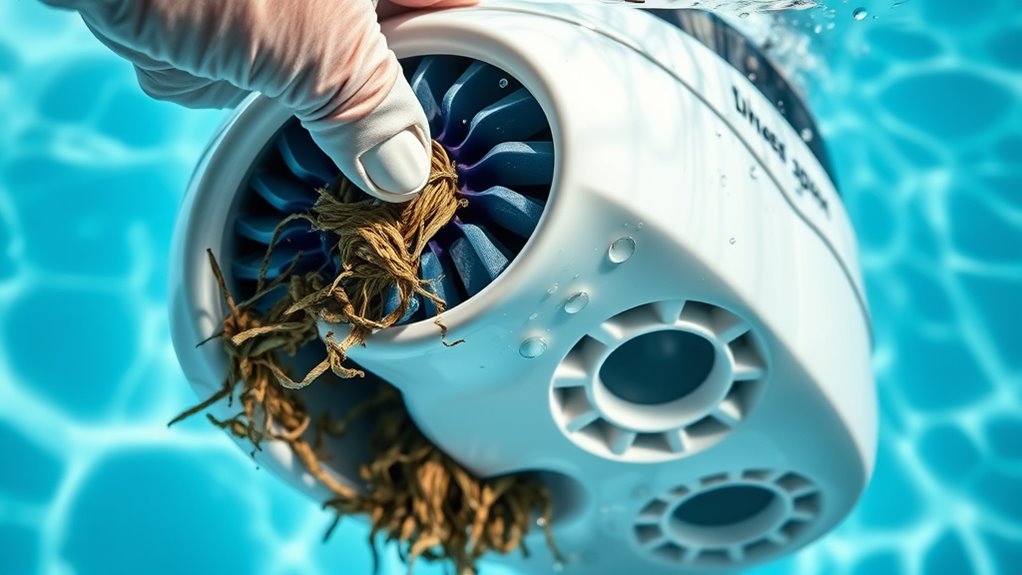
Inspecting and Cleaning the Pool Cleaner’s Hose and Suction Lines
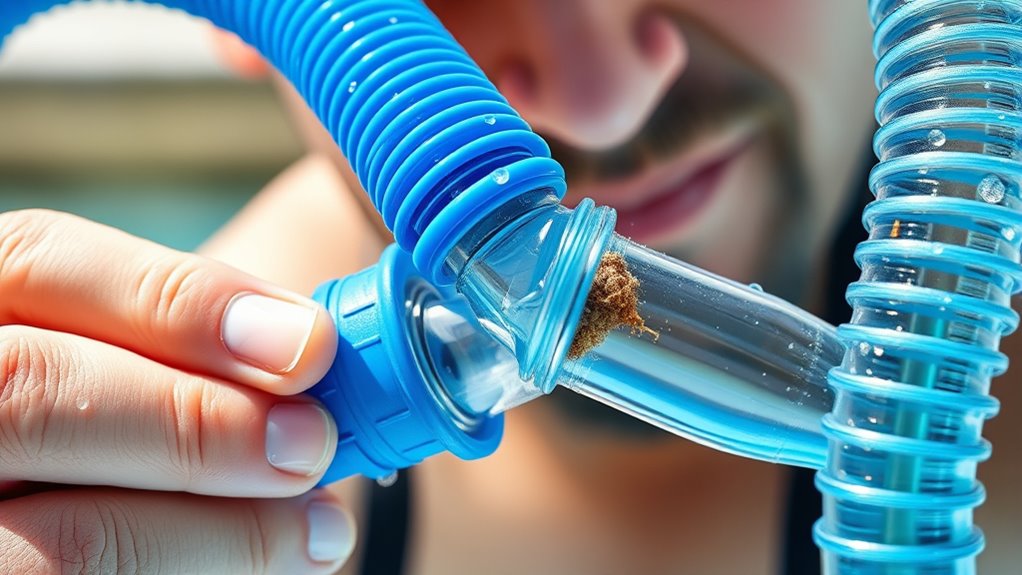
To guarantee your suction pool cleaner works efficiently, you need to regularly inspect and clean its hose and suction lines. Start with a thorough hose inspection to check for cracks, leaks, or blockages that could hinder suction. Next, perform suction line cleaning by flushing out debris or buildup that may restrict water flow. Here are three key steps:
- Remove the hose from the cleaner and pool, then check for damage or obstructions.
- Use a hose brush or water pressure to clear any debris inside.
- Examine the suction line for clogs or leaks, and clear or repair as needed.
- Consider using regulatory standards information to better understand how water quality or lighting conditions in your pool area might affect your cleaner’s performance. Proper maintenance of hoses and suction lines is essential for optimal Volkswagen Tuning performance and longevity. Regularly performing hose inspection and suction line cleaning keeps your cleaner running smoothly and prevents common suction issues. Additionally, staying informed about industry trends can help you adopt new techniques for maintaining your equipment effectively. Ensuring the water quality in your pool can also influence the efficiency of your suction pool cleaner, making water quality standards an important consideration.
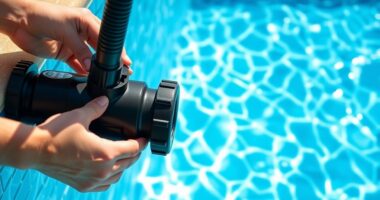
Ensuring Proper Placement and Attachment of the Cleaner
Proper placement and attachment of your suction pool cleaner are essential for ideal performance. Begin by confirming the cleaner is correctly attached to the hose and connected securely to the skimmer or dedicated suction line. Check that the cleaning solution isn’t causing blockages or leaks, which can hinder suction. Inspect the electrical wiring of any powered components to verify they’re intact and properly connected, preventing electrical issues that could stop the cleaner from functioning. Make sure the cleaner is evenly distributed across the pool, avoiding tangles or obstructions that could reduce suction efficiency. Proper placement ensures the cleaner covers the pool surface effectively, while secure attachments prevent loss of suction. Regularly check these connections and wiring to maintain excellent cleaning performance. Incorporating software quality assurance best practices such as regular inspections can help identify potential issues early and ensure consistent operation. Additionally, ensuring the pool’s water level is adequate helps maintain proper suction and prevents the cleaner from losing contact with the surface. Maintaining trustworthiness of the equipment by choosing reliable components can also enhance performance and longevity. Conducting routine maintenance like cleaning filters and inspecting hoses further supports reliable operation and prolongs the life of your cleaner. Monitoring home decor elements like the pool surroundings can also enhance overall cleanliness and aesthetic appeal.
Verifying the Pump and Filter System Functionality
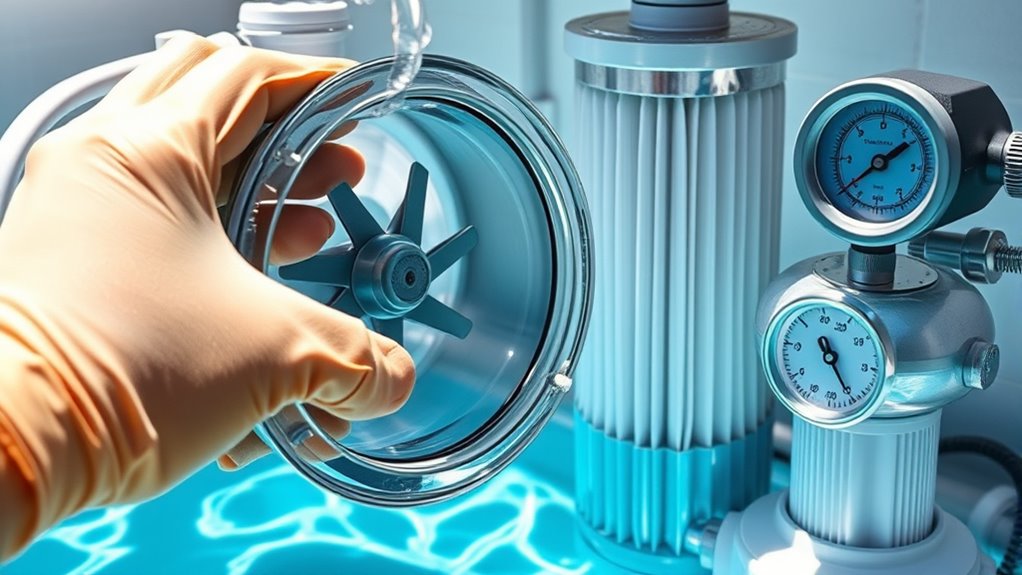
Before troubleshooting your suction pool cleaner, make certain that your pump and filter system are functioning correctly. A well-maintained pump and clean filter are essential for proper suction.
Here are three key steps to verify system performance:
- Check your pump for unusual noises or vibrations, which could indicate a need for pump maintenance.
- Ensure the filter is clean; a clogged filter reduces water flow and suction. Remove and rinse the filter thoroughly.
- Confirm that the pump strainer basket isn’t blocked or debris-filled, allowing unrestricted water flow.
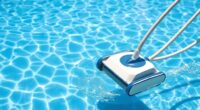
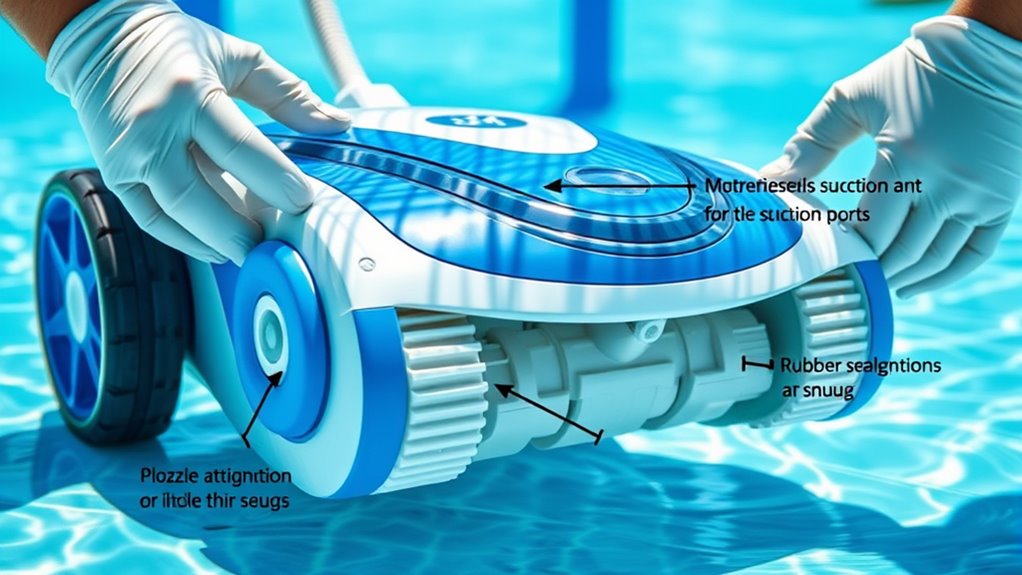
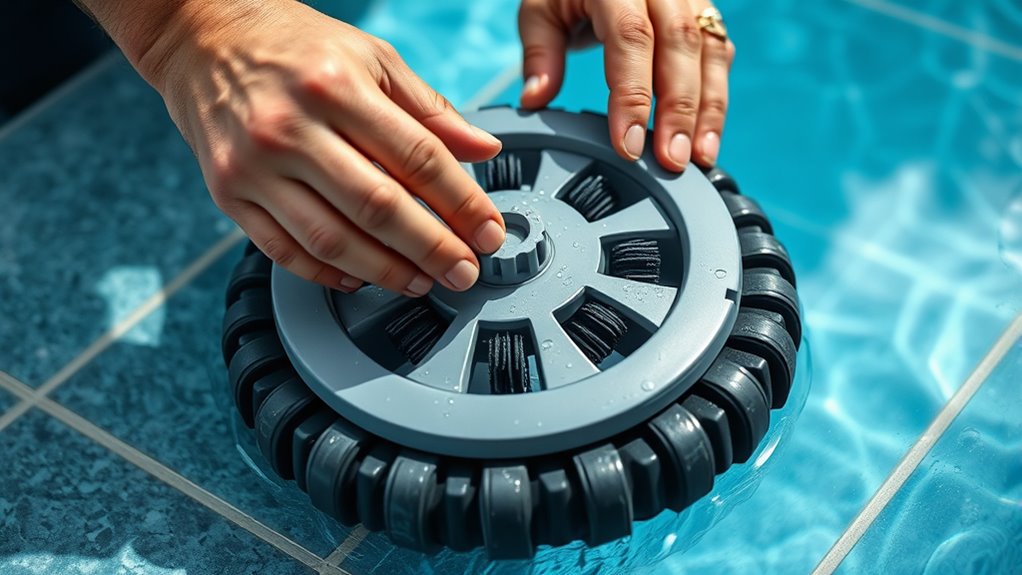
Examining the Cleaner’s Brushes and Wheels for Wear and Obstructions
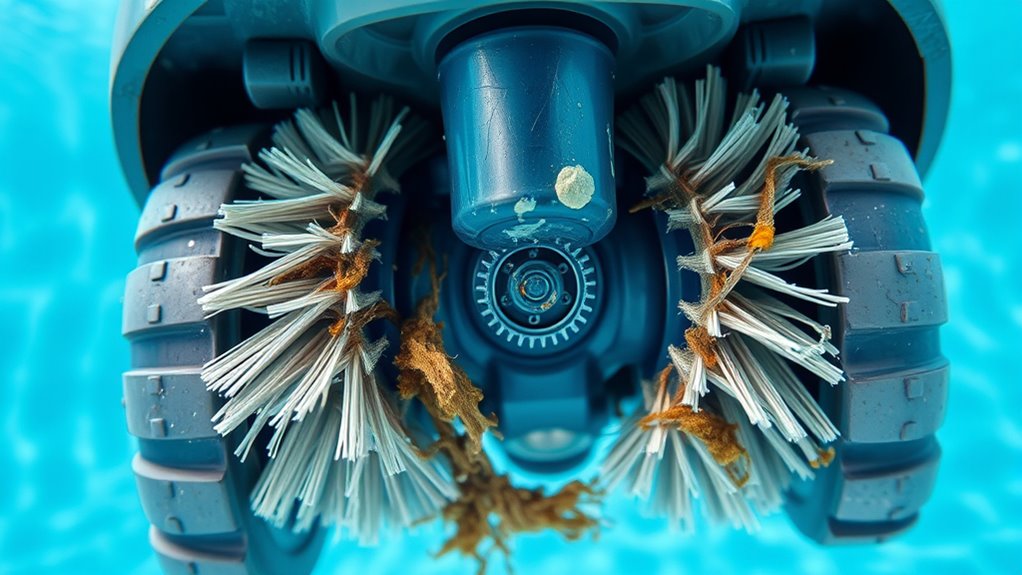
Examining your cleaner’s brushes and wheels for wear and obstructions is a crucial step in maintaining peak performance. Check the brushes for signs of brush wear, such as thinning bristles or uneven edges, which can reduce cleaning efficiency. If the brushes are worn out, replace them to guarantee proper debris pickup. Inspect the wheels for obstructions like debris, hair, or algae that might hinder movement. Wheel obstructions can cause the cleaner to get stuck or move inefficiently. Clear any debris from the wheels and ensure they spin freely. Damaged or obstructed wheels and worn brushes can impair your cleaner’s navigation and suction. Regular inspection and maintenance of these parts keep your pool cleaner operating smoothly and prolong its lifespan. Incorporating proper maintenance techniques and understanding the vibrational energy involved can further enhance your cleaner’s performance and longevity. Additionally, understanding the importance of preventive care can help avoid costly repairs and ensure consistent cleaning results. Maintaining coupling mechanisms is also vital, as they facilitate smooth operation and prevent motor strain. Recognizing the role of routine inspections can further help in early detection of issues before they escalate.
Testing for Air Leaks in the Hose or Connections
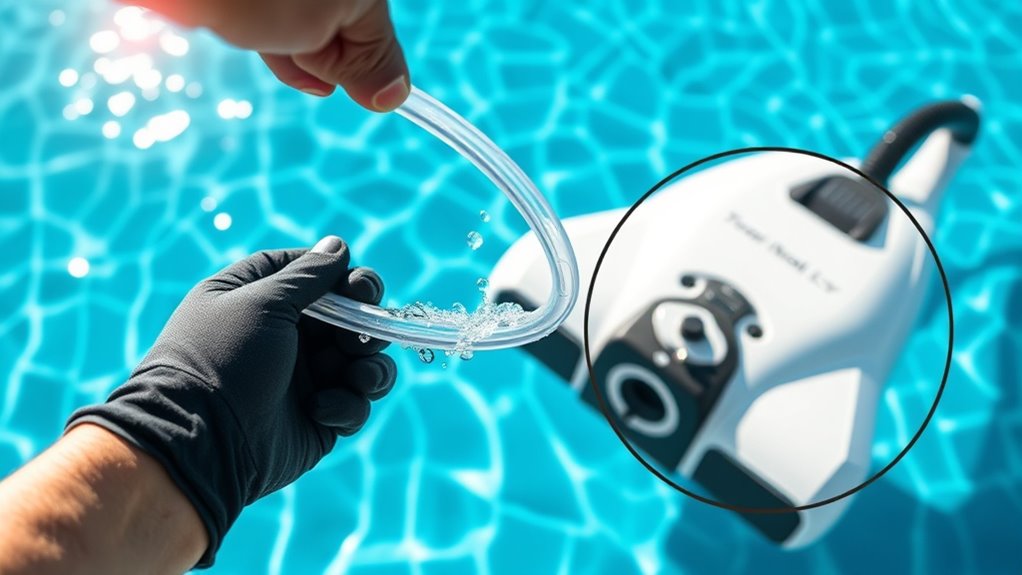
Start by inspecting the hose for any cracks or visible damage that could cause leaks. Then, check all connection fittings to make certain they’re tight and secure. Finally, submerge the hose and fittings in water, listening carefully for any hissing sounds that indicate air bubbles escaping. Be sure to also monitor for air leaks in the system, as even small leaks can impair the cleaner’s performance. Regularly inspecting the seal integrity of connections can help prevent unnoticed leaks and ensure optimal operation. Additionally, understanding the symptoms of breast cancer can highlight the importance of maintaining a well-sealed system to prevent contamination. Recognizing signs of system failure early can save time and resources in troubleshooting.
Inspect Hose for Cracks
Have you noticed the suction suddenly weakening or the cleaner not moving as expected? Your first step is to inspect the hose for cracks, which can cause leak detection issues. To do this effectively:
- Check the entire length of the hose for visible cracks or tears.
- Feel along the hose for soft or brittle spots that might indicate damage.
- Look for any loose or damaged fittings that could be causing leaks.
- Consider inspecting the hose material for durability and eco-friendliness, as some materials are more prone to cracking over time.
Hose cracks are a common culprit for reduced suction. Even small cracks can considerably impact performance. Carefully examining the hose helps identify leaks early, ensuring you can replace or repair damaged sections. This quick check can save you time and improve your pool cleaner’s efficiency.
Check Connection Fittings
If your pool cleaner isn’t maintaining strong suction or isn’t moving properly, testing the connection fittings for air leaks is a crucial step. Start by inspecting all connection fittings along the hose and at the intake port. Look for signs of looseness, cracks, or damage that could compromise seal integrity. To check for leaks, you can gently spray a soapy water solution on the fittings and observe for bubbles, which indicate escaping air. Ensure that all fittings are tightly connected and properly sealed. Even small gaps can cause a significant drop in suction. Address any loose or damaged fittings immediately by tightening or replacing them. Maintaining the seal integrity of connection fittings is essential to keep your pool cleaner functioning efficiently. Regular inspection and maintenance of your pool equipment can prevent issues related to air leaks and ensure optimal performance of your cleaner.
Submerge and Listen
Wondering how to detect hidden air leaks in your pool cleaner’s hose or connections? Submerging the hose and listening carefully can help. First, make certain the cleaner is turned on and the hose is submerged fully in the pool. Then, focus on these key steps:
- Listen for any hissing or unusual cleaner noise that indicates escaping air.
- Check for inconsistent movement or poor pool water clarity, which can signal leaks.
- Observe if the hose bubbles excessively or if the cleaner stalls, both signs of air escaping.
- Be aware that vacuum system maintenance can help identify and fix leaks more effectively if DIY methods don’t resolve the issue.
Adjusting the Cleaner’s Float and Weight Distribution
Adjusting the cleaner’s float and weight distribution is crucial for guaranteeing ideal movement and cleaning performance. Start with float adjustment to control the cleaner’s buoyancy, which affects its ability to glide smoothly over the pool surface. If the cleaner is too buoyant, it may stay at the surface; if it sinks, it won’t cover the pool effectively. Adjust the float by adding or removing weights or floats as recommended by your model’s instructions. Next, focus on weight distribution to guarantee the cleaner stays balanced. Proper weight placement helps it navigate corners and obstacles without getting stuck. Test the adjustments by running the cleaner and observing its movement. Fine-tuning float adjustment and weight distribution improves coverage and efficiency, guaranteeing your pool stays spotless.
Troubleshooting Low Suction or Poor Movement
Low suction or poor movement often indicates a blockage or an issue with the cleaner’s components. To troubleshoot, start by checking these key areas:
Low suction or movement suggests blockages or component issues—check hoses, filters, and pool chemistry to troubleshoot effectively.
- Hoses and intakes – Clear any debris or obstructions that could restrict water flow, impacting suction.
- Filter and skimmer baskets – Clean out debris regularly; clogged filters reduce efficiency.
- Pool chemistry – Ensure proper chemical balance; poor chemistry can cause algae or buildup that hinders cleaner movement.
Additionally, review your cleaning schedule. Regular maintenance prevents buildup and keeps the cleaner functioning at its best. If these steps don’t resolve the issue, consider inspecting the cleaner’s parts for wear. Properly maintaining your pool’s chemistry and routine cleaning schedules helps sustain suction power and smooth operation.
Replacing Worn or Damaged Parts to Restore Performance
You’ll want to check your pool cleaner for worn or damaged parts that could be hindering performance. Identifying these components is key to restoring efficiency. Once you spot the issues, replacing the faulty parts will get your cleaner back to working like new.
Identifying Worn Components
Worn or damaged components can critically hinder your suction pool cleaner’s performance, so it is crucial to identify them early. Look for signs like:
- Component corrosion on metal parts, which weakens their structure and causes leaks.
- Seal deterioration, leading to loss of suction and reduced cleaning efficiency.
- Cracks or tears in hoses and brushes that prevent proper water flow.
Inspect all moving parts closely, paying special attention to areas prone to wear. Corrosion often appears as rust or discoloration, while seals may become brittle or cracked. Recognizing these issues early helps you target parts that need replacement, preventing further damage. Addressing worn components promptly restores your cleaner’s suction power and keeps your pool spotless.
Replacing Damaged Parts
When you notice your suction pool cleaner isn’t performing as well as it should, replacing damaged parts is often the quickest way to restore its efficiency. Worn or broken components can hinder cleaning performance, especially if the pool’s chemical balance has shifted or if parts haven’t been stored properly outdoors. Check hoses, brushes, and seals regularly, replacing any that show cracks or deterioration. Proper outdoor storage prevents damage from UV rays and temperature fluctuations, prolonging part life. Consider the table below to identify common damaged parts and suitable replacements:
| Damaged Part | Replacement Tip |
|---|---|
| Hoses | Use UV-resistant hoses for durability |
| Brushes | Choose compatible, high-quality brushes |
| Seals | Replace with original manufacturer parts |
| Nozzles | Clear blockages or replace if worn |
Frequently Asked Questions
How Do I Reset My Suction Pool Cleaner After a Blockage?
When your suction pool cleaner faces a blockage, you typically need to perform a manual reset after removing the obstruction. First, turn off the pool pump and disconnect the cleaner. Clear out any debris or blockage you find, then reconnect the cleaner. To reset, press the reset button if available, or simply restart the system. This manual reset will help your cleaner operate smoothly again.
Can Debris in the Pool Affect the Cleaner’S Performance?
Debris accumulation in your pool can substantially affect your cleaner’s performance, as it may clog the filter and reduce suction power. When debris builds up, the cleaner struggles to move effectively and may miss areas. Regularly check and clean the filter to prevent clogging, ensuring peak suction and cleaning efficiency. Keeping debris at bay helps your pool cleaner work smoothly and maintains a clean, healthy pool environment.
What Safety Precautions Should I Take During Maintenance?
Did you know that over 50% of pool accidents involve electrical safety issues? During maintenance, you should always disconnect the power supply to prevent shocks. Wear protective gloves when handling chemicals, and avoid mixing them to prevent dangerous reactions. Keep electrical components dry and away from water, and handle chemicals in a well-ventilated area. Prioritizing electrical safety and chemical handling maintains your safety and ensures your pool stays in top condition.
How Often Should I Replace Parts of My Pool Cleaner?
You should follow a regular replacement schedule for your pool cleaner parts to guarantee peak performance. Typically, you’ll need to replace brushes, seals, and hoses every 6 to 12 months, depending on usage and part lifespan. Keep an eye on signs of wear and tear, like cracks or decreased suction, and replace parts promptly. Regular maintenance helps extend the lifespan of your cleaner and keeps it working efficiently.
Why Does My Cleaner Make Unusual Noises During Operation?
If your pool cleaner makes unusual noises, it’s often due to a noisy motor or stuck debris. You should check the motor for any obstructions or dirt that might cause strain. Also, inspect the brushes and wheels for debris that could be jammed, leading to strange sounds. Regularly cleaning these parts helps keep your cleaner running smoothly and reduces noise during operation.
Conclusion
So, after all that checking, it’s funny how a tiny clog or a loose connection can turn your pool cleaner into a lazy spectator. Sometimes, the solution is as simple as a quick fix, proving that even high-tech cleaners aren’t immune to good old-fashioned maintenance. Next time your cleaner stalls, remember: a little attention can save you a lot of frustration—and maybe even make it work better than ever. Who knew?