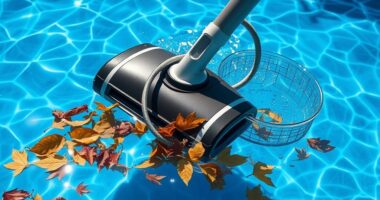
To replace parts on your suction pool cleaner, start by inspecting for worn or damaged components like hoses, brushes, and seals—look for cracks, tears, or buildup. Gather the right tools and replacement parts, then carefully remove old brushes and drive belts, ensuring the new ones fit snugly and are aligned properly. Swap out hoses and inspect internal parts like the impeller and nozzles. Proper reassembly and testing will keep your cleaner working efficiently; if you continue, you’ll learn the detailed steps for each part.
Key Takeaways
- Inspect hoses, brushes, and seals regularly for cracks, tears, or wear to identify parts needing replacement.
- Gather appropriate tools and replacement parts, ensuring compatibility before removing damaged components.
- Carefully disconnect and remove old drive belts, hoses, or internal parts, checking for debris or damage during the process.
- Replace worn or damaged parts, ensuring proper fit, alignment, and secure connections to maintain optimal suction.
- Test the cleaner after reassembly for leaks and proper operation, and perform routine maintenance to extend lifespan.
Identifying Worn or Damaged Parts
When inspecting your suction pool cleaner, look for signs of wear or damage that could affect its performance. Check hoses, brushes, and intakes for cracks, tears, or clogs. Worn or damaged parts may lead to poor cleaning and increased strain on the cleaner. As part of seasonal maintenance, examine seals and fittings to confirm they’re intact and preventing leaks. Poor pool chemistry, like unbalanced pH or high mineral levels, can accelerate component deterioration, so keeping your pool’s chemistry in check helps prolong equipment life. Look for uneven wear on brushes or reduced suction, which indicate the need for replacements. Regular inspections help catch issues early, ensuring your cleaner operates efficiently and extends its lifespan. Additionally, understanding filter replacement schedules and maintenance guidelines can further optimize your cleaner’s performance. Proper filtration system maintenance is essential for maintaining optimal suction and overall cleaner efficiency. Incorporating AI-powered diagnostics can also help identify potential issues before they become major problems, saving time and repair costs. Monitoring component durability closely allows you to predict when parts may need replacement, which is supported by ongoing research into preventative maintenance strategies that reduce downtime and extend equipment lifespan.
Gathering Necessary Tools and Replacement Parts
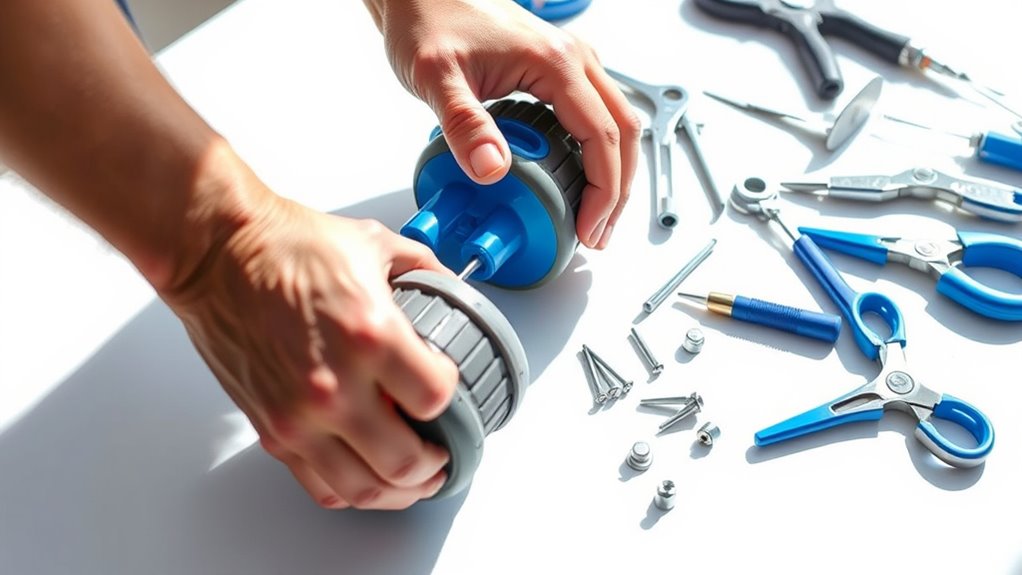
Before you start replacing parts on your suction pool cleaner, gather all the necessary tools and replacement components. This guarantees a smooth process and helps you avoid unnecessary delays. First, check that you have the correct replacement parts, such as brushes, hoses, or filters. Second, assemble essential tools like screwdrivers, pliers, and a wrench. Third, keep safety gear nearby, including gloves and goggles, to follow pool safety precautions. Remember, maintaining your pool’s equipment impacts overall pool chemical maintenance, so ensure parts are compatible. Properly gathering tools and parts minimizes the risk of damaging your cleaner or harming yourself. Taking these steps upfront guarantees a safe, efficient replacement process, keeping your pool in top condition and safe for everyone. Additionally, understanding the essential oils used in cleaning products can help you choose non-toxic, environmentally friendly options for pool maintenance. To further ensure safety and effectiveness, review manufacturer instructions for your specific pool cleaner model before beginning. Also, verifying the compatibility of parts ensures that replacements fit properly and function correctly. Ensuring that you have the right replacement parts on hand can significantly reduce the time needed for repairs and prevent the need for additional visits to the store. Moreover, familiarizing yourself with tuning options for pool equipment can optimize performance and longevity of your cleaner.
Removing the Old Brush Sets
Start by detaching the old brushes from your pool cleaner, making sure to press any release tabs or screws. Once removed, inspect the brushes and surrounding parts for any signs of wear or damage. This step guarantees you’re prepared to replace only what’s necessary and maintain your cleaner’s efficiency. Regularly checking for wear and tear helps ensure optimal performance and prevents costly repairs. Understanding self-watering plant pots can help you better care for your plants and avoid overwatering issues. Additionally, reviewing the best laundry detergents can help keep your pool cleaner functioning smoothly by preventing residue buildup. To further optimize your maintenance routine, consider the importance of parts compatibility to ensure replacements fit properly and perform reliably. Staying informed about AI vulnerabilities can also guide you in selecting more durable and safe replacement parts for your equipment.
Subheading 1: Detach Old Brushes
To replace the brushes on your suction pool cleaner, begin by detaching the old brush sets. Proper removal is essential for effective pool maintenance and maintaining chemical balance. First, turn off your cleaner and disconnect it from the pool. Next, locate the brush attachment points; these are usually clips or screws holding the brushes in place. Finally, carefully unclip or unscrew the old brushes, ensuring you don’t damage the surrounding parts. During this process, check for any debris or buildup that might hinder reattachment or impact cleaning efficiency. Removing worn brushes helps keep your pool clean and ensures the new parts function correctly. Be gentle to avoid unnecessary damage, and keep track of all parts for easy reassembly. Additionally, inspecting the wear and tear of parts can prevent future issues and extend the lifespan of your pool cleaner. Regularly maintaining your equipment can also improve overall performance and reduce the need for frequent replacements. Incorporating a routine check can also help identify potential issues early, saving time and cost in the long run. Ensuring the proper fit of replacement parts can also enhance the effectiveness of your pool cleaner. Paying attention to the condition of seals and gaskets can prevent leaks and optimize suction power.
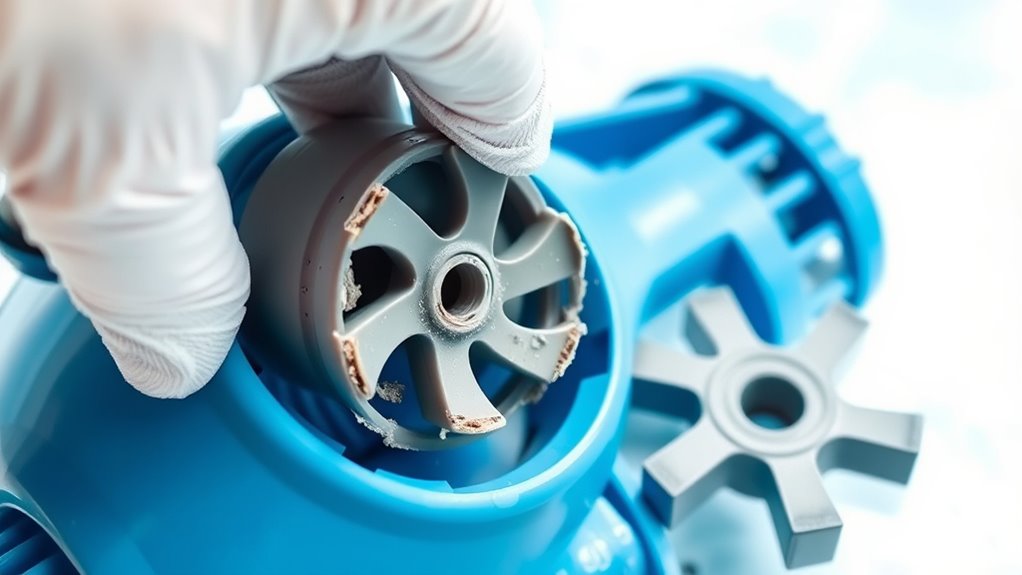
Subheading 2: Inspect for Damage
As you remove the old brush sets, carefully examine each component for any signs of damage or excessive wear. Look for cracks, warping, or broken parts that could hinder cleaning performance. Check the brushes’ bristles for wear; worn brushes can reduce efficiency and may damage your pool’s surface. It’s also important to inspect the housing and connectors for cracks or corrosion, especially if pool chemistry has fluctuated or there’s been frequent chemical imbalance. Before handling the parts, confirm you follow safety precautions—wear gloves and eye protection to avoid injury from sharp edges. Proper inspection prevents installing damaged parts, which can lead to further issues or damage to the cleaner. Additionally, understanding divorce statistics can inform you about common challenges and solutions in complex situations. Regularly inspecting filter components can help maintain optimal cleaning performance and prevent costly repairs. When inspecting these parts, always consider the durability and functionality of the gear to ensure long-term reliability. Conducting routine checks on wear and tear can help identify potential issues early and extend the lifespan of your pool cleaner. Taking your time now saves you effort and ensures your pool cleaner functions at its best, especially when you evaluate the risk management strategies associated with equipment maintenance.
Replacing the Drive Belt

Replacing the drive belt on your suction pool cleaner is a straightforward process that helps restore its proper function. Over time, the belt can wear out or slip, leading to common belt issues like reduced movement or noise. To perform a drive belt replacement, follow these steps:
- Turn off the cleaner and drain the water.
- Remove the cover to access the belt area.
- Carefully take out the old belt and install the new one, ensuring it fits snugly around the pulleys.
- Verify proper belt tension and alignment before reassembling the cover.
Make sure the belt is properly aligned and tensioned. Regularly inspecting and replacing the drive belt prevents further damage and keeps your cleaner running efficiently. This simple maintenance step is key to avoiding more extensive repairs later on.
Swapping Out the Hoses and Connectors
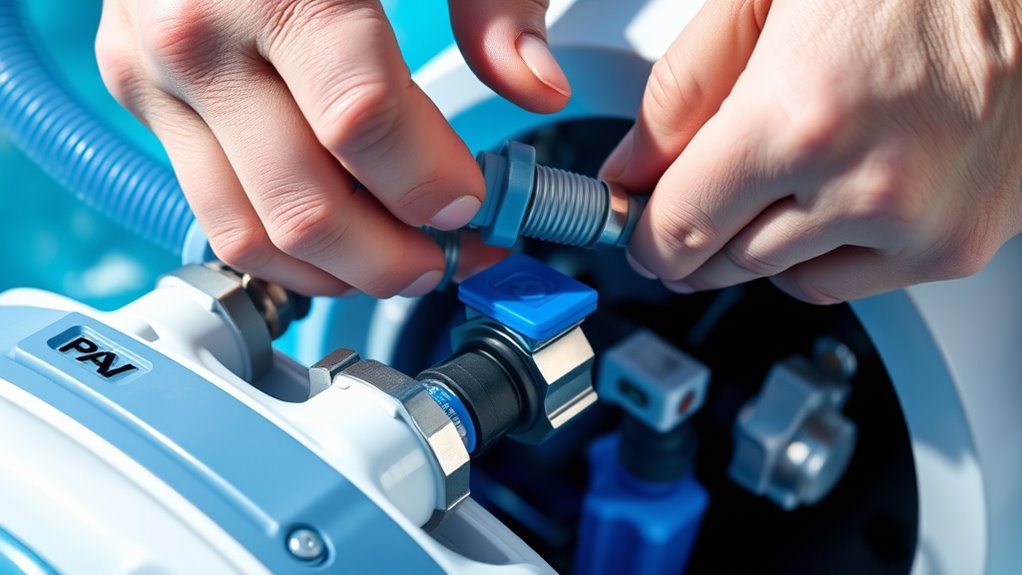
When hoses or connectors become damaged or worn out, swapping them out is essential to maintain your pool cleaner’s performance. Start by disconnecting the hose connections carefully, ensuring you don’t damage the fittings. Check that the new hoses and connectors match the existing system for connector compatibility; using incompatible parts can lead to leaks or poor suction. Remove the old hoses from the cleaner and attach the new ones securely, making sure all connections are tight. Double-check that the connectors fit snugly and are compatible with your cleaner model. Properly fitted hoses and connectors ensure maximum suction and prevent leaks that could reduce cleaning efficiency. Regularly inspecting and replacing worn hoses and connectors keeps your pool cleaner operating smoothly and extends its lifespan.
Inspecting and Replacing the Impeller and Nozzles
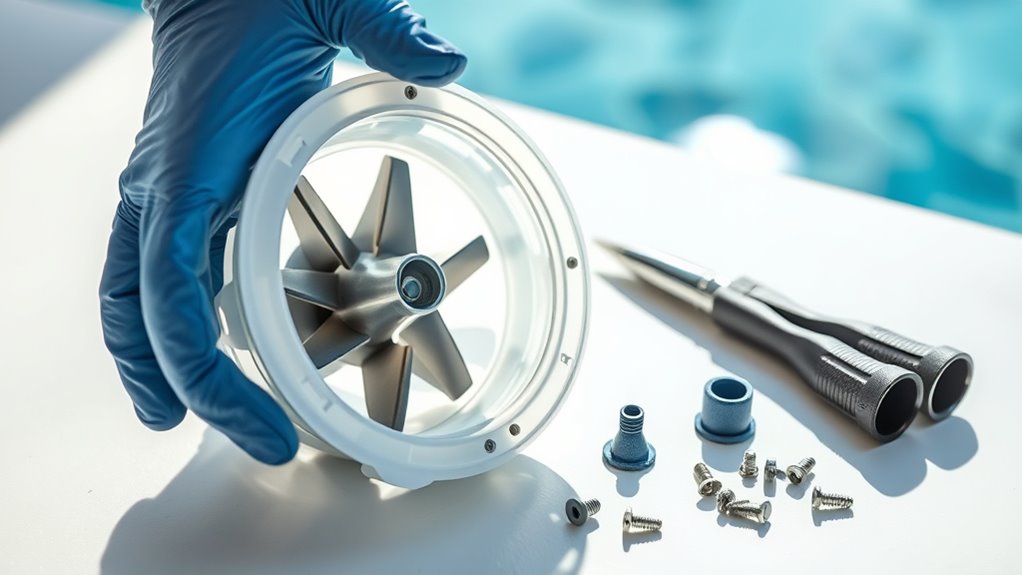
Regularly inspecting the impeller and nozzles is crucial for keeping your pool cleaner working effectively. If you notice decreased suction or uneven cleaning, it might be time to check these parts. To do this:
- Remove the cleaner’s cover and access the impeller and nozzles.
- Look for debris, cracks, or wear that could hinder performance.
- Clean or replace damaged components to prevent motor repair issues and maintain excellent filter maintenance.
Ensure the impeller spins freely and nozzles are clear of obstructions. Regular inspection prevents clogs and keeps your pool cleaner functioning smoothly. Neglecting these parts can cause strain on the motor, leading to costly repairs. Staying on top of filter maintenance and component replacement ensures your cleaner stays efficient.
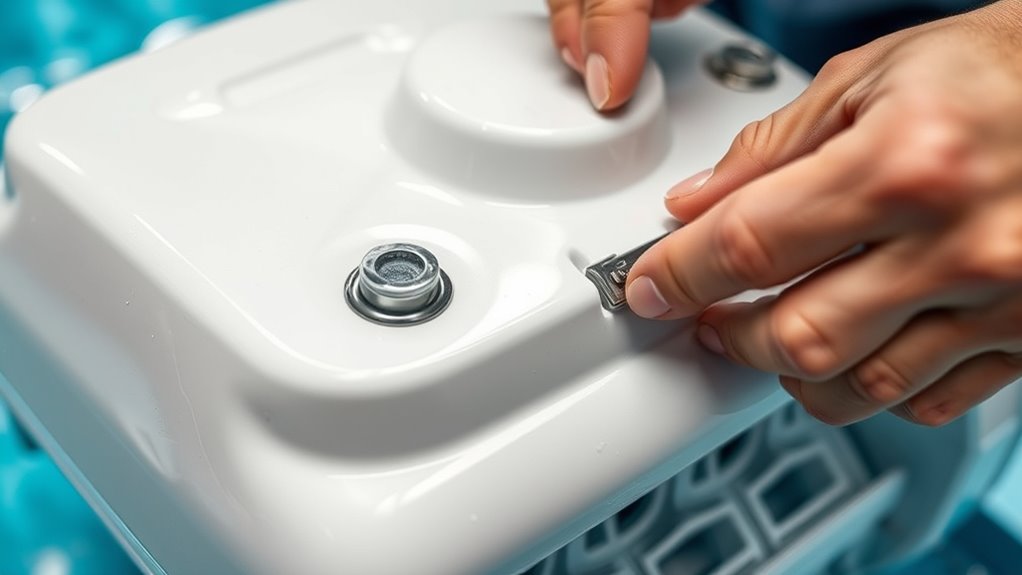
Reattaching and Securing the New Components
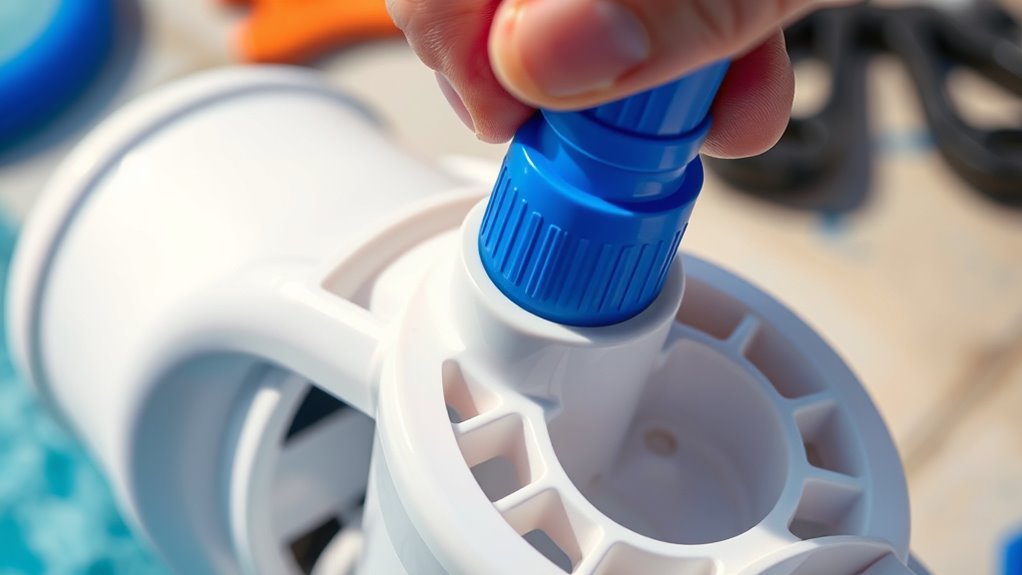
When reattaching new parts, make certain they are properly aligned to fit correctly. Secure each component firmly to prevent leaks or dislodging during operation. Taking these steps ensures your pool cleaner will work efficiently and last longer.
Ensuring Proper Alignment
To make certain your suction pool cleaner functions properly after replacing parts, it’s vital to carefully reattach and secure each component in the correct alignment. Proper alignment ensures ideal suction power calibration and maintains balanced pool water chemistry.
Follow these steps:
- Check that the impeller and intake fittings are aligned to avoid air leaks that can reduce suction.
- Confirm that the hose connections match the manufacturer’s specifications, preventing misalignment.
- Test the cleaner’s movement to ensure components move smoothly without wobbling, indicating correct positioning.
Misaligned parts can disrupt suction power calibration and affect water flow. Take your time to verify each connection so the cleaner performs efficiently and maintains the right pool water chemistry.
Securing Components Firmly
After confirming proper alignment, the next step is to securely reattach and fasten each component. Securing components firmly ensures they stay in place during operation, reducing the risk of leaks. Use the appropriate tools and tighten fasteners according to the manufacturer’s instructions, but avoid over-tightening, which can damage parts. Check that gaskets and seals are properly seated to prevent water from escaping. Pay close attention to hose connections and clip them tightly to avoid disconnections during cleaning. Confirm all fittings are secure before testing the cleaner. Properly securing components not only maintains excellent suction power but also prevents leaks that could compromise the cleaner’s performance. Taking care here ensures your pool cleaner functions efficiently and lasts longer.
Testing Your Pool Cleaner After Repairs

Once you’ve replaced the necessary parts on your suction pool cleaner, it’s vital to test its performance to make certain everything functions correctly. Start by running the cleaner in the pool and observing its movement and suction power. Check for leaks or unusual noises that could indicate improper installation. Make sure your pool chemistry is balanced, as this affects cleaner efficiency. During seasonal maintenance, testing helps confirm the repairs hold under typical conditions. To streamline testing, consider these steps:
After repairs, test your suction pool cleaner for proper movement, suction, and leaks to ensure optimal performance.
- Verify the cleaner covers the entire pool surface evenly.
- Inspect for proper suction and debris collection.
- Monitor for any signs of leaks or system issues.
Performing these checks ensures your cleaner operates at its best and prolongs its lifespan.
Frequently Asked Questions
How Often Should I Replace Parts on My Suction Pool Cleaner?
You might wonder how often you should replace parts on your suction pool cleaner. Following a regular maintenance schedule, check the parts every few months and replace them as needed. The replacement frequency depends on usage and wear; for example, brushes and seals typically last 6-12 months. Staying on top of maintenance guarantees your cleaner runs efficiently and lasts longer, saving you money and effort in the long run.
Can I Upgrade to Higher-Quality Replacement Parts for Better Performance?
Think of your pool cleaner as a race car—upgrading parts can boost its performance. Yes, you can definitely opt for high-quality upgrades to improve efficiency and longevity. Investing in superior replacement parts acts like adding turbocharged engines, making your cleaner work like a well-oiled machine. Performance enhancement becomes effortless, and your pool stays cleaner longer, giving you more time to enjoy the water without worrying about the cleaner’s durability.
Are There Specific Brands Recommended for Replacement Parts?
When choosing replacement parts, you might wonder about specific brands recommended for compatibility. You should look for trusted brands known for brand compatibility and quality assurance to guarantee your pool cleaner performs well. Aftermarket options can be a good choice if they meet the same standards, but always verify compatibility with your model. Doing some research helps you find reliable brands that deliver durable parts and excellent performance.
What Safety Precautions Should I Take During Repairs?
When repairing your pool cleaner, prioritize safety by wearing protective gear like gloves and goggles to prevent injuries. Always unplug the device before starting repairs to guarantee electrical safety. Keep your workspace dry and organized to avoid accidents. If you’re unsure about any step, consult the manufacturer’s instructions or a professional. Taking these precautions helps keep you safe while effectively repairing your suction pool cleaner.
How Do I Troubleshoot if the Cleaner Still Doesn’T Work After Replacement?
Your pool cleaner’s stubborn refusal to work is more frustrating than a thousand suns. For troubleshooting tips, start by checking power connections and hoses for leaks or blockages. Inspect the brushes and wheels for wear, and make certain the filter is clean. Common issues often stem from clogs or misaligned parts. If problems persist, review the user manual or call a professional. These steps usually resolve most issues efficiently.
Conclusion
Once you’ve replaced those parts, your pool cleaner will become an unstoppable underwater superhero, conquering dirt and debris with the speed of a lightning bolt and the precision of a laser-guided missile. No stubborn grime or stubborn algae can stand in its way now! With your expert repairs, you’ll have a pool cleaner that works like a turbocharged, indestructible cleaning machine—making pool maintenance feel effortless and almost magical. Plunge in and enjoy crystal-clear waters like never before!