The “designer tape” trick involves using painter’s tape to outline your furniture on the floor, helping you visualize layouts before moving heavy pieces. Gather colorful tape, measure your furniture accurately, and mark its shape on the floor. Experiment by shifting the tape outlines to see what fits best and improves flow. This simple method saves time, prevents mistakes, and boosts confidence in your design choices. Keep exploring, and you’ll discover even more tips to perfect your space.
Key Takeaways
- Use painter’s tape to outline furniture footprints directly on the floor for accurate spatial visualization.
- Measure and cut tape to scale, creating clear, adjustable outlines for different furniture arrangements.
- Map out traffic flow and pathways with tape to identify optimal furniture placement and prevent obstructions.
- Experiment with tape outlines, moving and adjusting them to refine layout before moving actual furniture.
- Incorporate color-coded or labeled tape to distinguish zones, enhancing clarity during planning and adjustments.

Duck Brand Clean Release Painter's Tape, 0.94 Inch x 60 Yards (240193)
Ideal for a variety of surfaces including painted walls, trim, glass, wood and metal
As an affiliate, we earn on qualifying purchases.
As an affiliate, we earn on qualifying purchases.
Struggling to Visualize Your Furniture Layout? Here’s a Simple Solution
If you’re having trouble picturing how your furniture will fit in a space, a simple trick can make all the difference. Use visualization techniques combined with accurate room measurement to plan your layout effectively. Start by measuring your room carefully, noting the length, width, and key features like windows and doors. Then, create a scaled floor plan on paper or a digital tool. Use masking tape or painter’s tape to outline the furniture’s footprint directly on your floor, based on these measurements. This allows you to see exactly how each piece will fit and interact within the space. Incorporating room measurement accuracy and cloud-based planning tools can further enhance your ability to experiment with different layouts virtually before making any physical changes. Visualization techniques like this give you a clearer picture of your layout before moving furniture, helping you avoid clutter and awkward arrangements. Additionally, smart planning technology can assist in refining your layout with precision and automation, ensuring an optimal fit.

Guirnd 12PCS Colored Masking Tape, Kids Art Supplies, DIY Craft Tape, Colored Tape Rolls, Colored Painters Tape, 1.7cm x 12m (2/3In x 13Yards)
12 Colored Masking Tape: They come in yellow, purple, black, white, pink, orange, light green, dark green, red,…
As an affiliate, we earn on qualifying purchases.
As an affiliate, we earn on qualifying purchases.
Gathering Supplies: What You Need for Tape-Planning Your Room
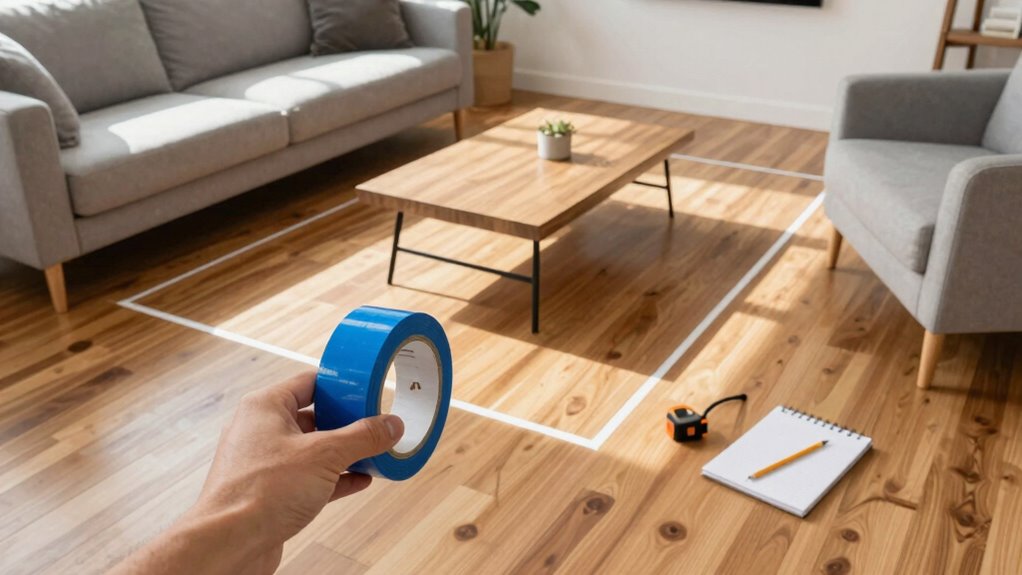
To start taping out your furniture layout, gather the supplies you’ll need for accurate and effective planning. First, pick up painter’s tape in a color that complements your color schemes—bright for visibility or neutral to blend in. Measure and cut tape strips to represent your furniture pieces, ensuring they match the scale of your room. Consider including small labels or color-coded markers to distinguish different furniture types or zones. Don’t forget to account for lighting options by marking areas where lighting fixtures or lamps will go, helping you visualize how lighting interacts with furniture placement. Keep a notepad or smartphone nearby to jot down ideas or adjustments. With these supplies, you’ll create a clear, adaptable room layout that aligns with your style and lighting needs.

GDMINLO Soft Tape Measure Double Scale Body Sewing Flexible Tailor Craft Vinyl Ruler for Weight Loss Medical Body Measurement, Has Centimetre Scale on Reverse Side 60-inch(White)
Measuring range: 0 to 60 inches and 0 to 150 centimeters. There is a centimeter scale on the…
As an affiliate, we earn on qualifying purchases.
As an affiliate, we earn on qualifying purchases.
Measure Carefully: Tips for Accurate Tape Measurements
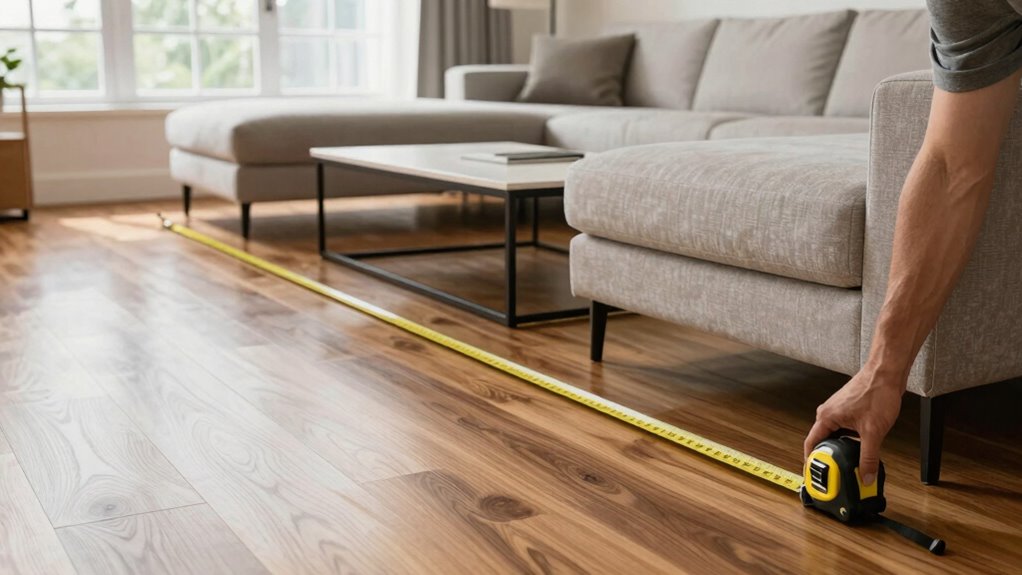
Accurate measurements are the foundation of a successful tape trick, so take your time and double-check your work. When measuring for your furniture layout, prioritize measuring accuracy to avoid errors that can throw off your entire plan. Use a high-quality tape measure with clear markings, and always lock it securely in place before recording the measurement. Be consistent—measure from the same starting point and take multiple readings if needed. Avoid rushing, as small mistakes can lead to major misalignments later. Keep your tape measurement straight and taut, not slack or crooked. Remember, precision is key. Double-check your measurements before marking or taping, ensuring your furniture layout will fit perfectly and look just right. Incorporating knowledge about measurement accuracy can further improve your results and prevent costly mistakes, especially since proper measurement techniques are crucial for a polished, professional-looking layout. Additionally, understanding measurement precision helps maintain consistency throughout your project. Paying attention to measurement consistency ensures that all parts of your layout align perfectly from start to finish. Furthermore, practicing these techniques consistently can help develop your measurement skills, leading to more reliable results in future projects.

ACEGMET Laser Measure, 229ft/70m Laser Measurement Tool, S9 Room Laser Measuring Tool with 2 Bubble Levels, LCD Backlit Display, IP54 Waterproof, Pythagorean Mode for Distance, Area, Volume
Precision at Your Fingertips: ACEGMET laser measure delivers exact measurements with just one tap—effortlessly accurate for DIY projects…
As an affiliate, we earn on qualifying purchases.
As an affiliate, we earn on qualifying purchases.
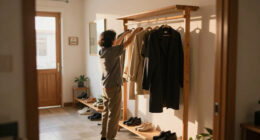
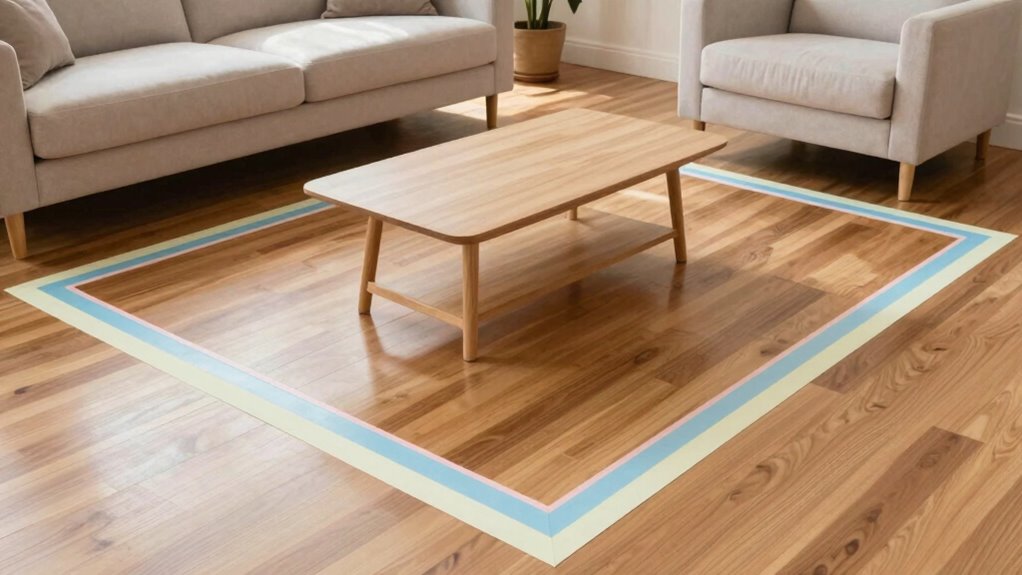
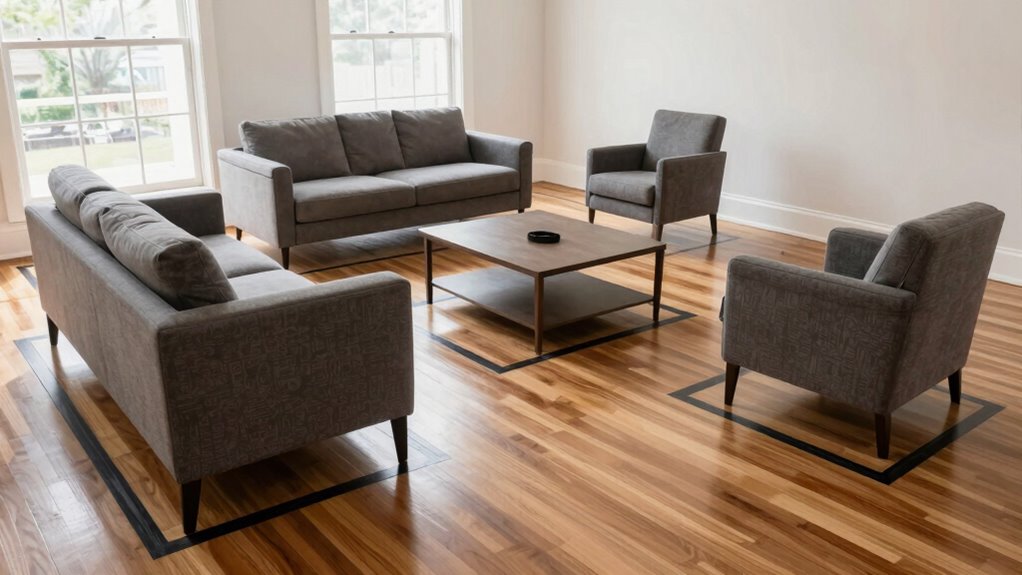
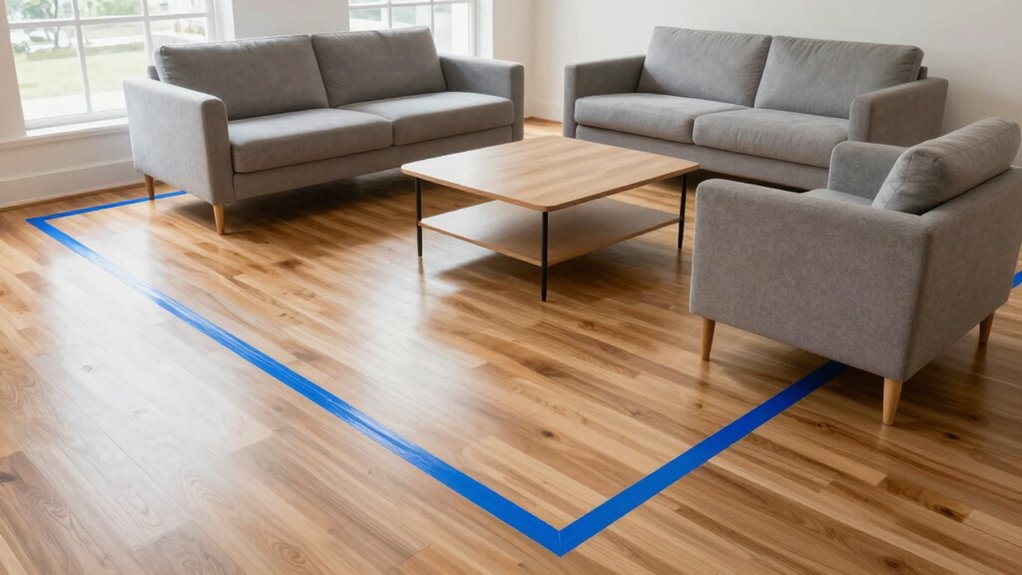
Outline Your Furniture on the Floor With Painter’s Tape
Before moving furniture, use painter’s tape to outline its shape on the floor. Make sure to measure and mark the exact dimensions to guarantee a perfect fit. Visualizing the space this way helps you spot potential issues before rearranging. Incorporating spatial awareness techniques can further improve your furniture placement decisions. Additionally, considering essential oils for space calming can create a more relaxing environment during your redesign process. Remember, practicing visualization skills can enhance your ability to plan and organize your space effectively. Using smart home automation devices can also assist in simulating different layouts and optimizing your interior design. Embracing connected home fitness concepts can inspire innovative ways to test and refine your room arrangements.
Measure and Mark Dimensions
Laying out your furniture plan on the floor begins with measuring and marking its dimensions. Use a tape measure to determine the size of each piece, considering your decorating ideas and preferred furniture styles. Mark these measurements on painter’s tape, creating clear outlines for each item. This step helps you visualize how different furniture pieces will fit and interact within your space. Be precise with your measurements to avoid surprises later. As you mark, think about flow and function—how people will move around the room and where each piece should go. Adjust the tape outlines as needed until you’re satisfied with the layout. This simple process ensures your final arrangement is both functional and visually appealing, saving you time and effort in the long run. Incorporating digital tools for room planning can further enhance your accuracy and confidence in the layout design.
Visualize Space Beforehand
To truly see how your furniture will fit and flow in the space, start by outlining each piece on the floor with painter’s tape. This simple step improves your perception of space and helps you visualize the furniture arrangement more accurately. By creating these tape outlines, you can experiment with different layouts without moving heavy furniture.
| Step | Purpose |
|---|---|
| Tape each piece | Test fit and flow in your room |
| Adjust tape placement | Refine your furniture arrangement |
| Step back and observe | Assess how space feels and functions |
| Make changes as needed | Finalize the best layout before moving furniture |
This visual approach helps you avoid guesswork, ensuring your final setup feels right and maximizes your space’s potential.
Experiment With Different Furniture Arrangements Using Tape
Try moving the tape outlines to see how different furniture arrangements feel in your space. This helps you visualize how each setup affects movement and flow. Adjust the pieces until you find a layout that feels natural and inviting. Considering safe and accessible design can help ensure the space is comfortable and functional for everyone. Incorporating visual cues can also assist in understanding how the layout impacts overall functionality. Using furniture placement techniques can further enhance your ability to create a balanced and harmonious environment. Additionally, paying attention to space planning principles can optimize the usability and aesthetic appeal of your layout. Exploring ventilation considerations can improve comfort and air quality within your space.
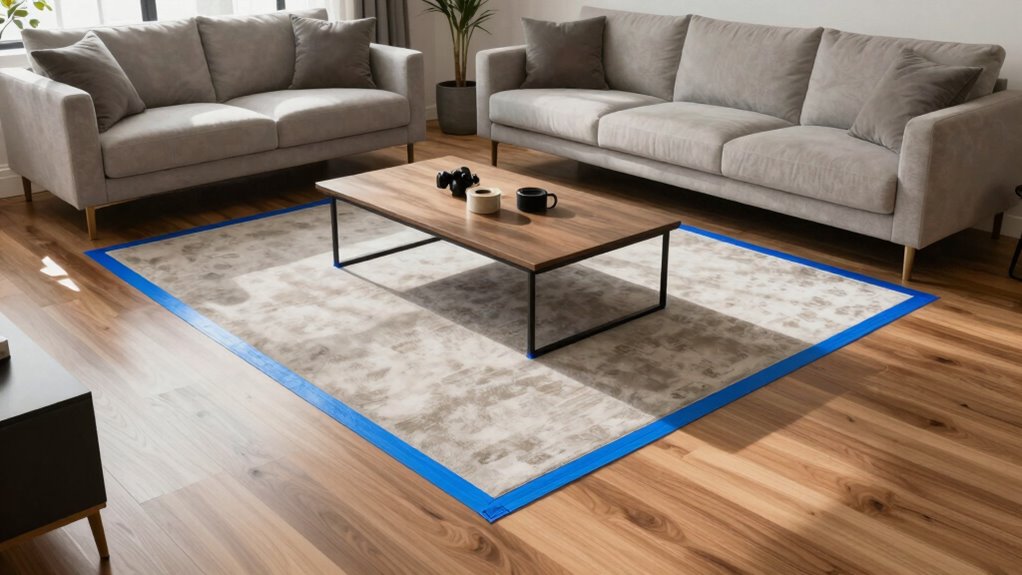
Visualize Space Beforehand
Before moving furniture into your space, it’s helpful to visualize how different arrangements will look and feel. Using tape to outline furniture options allows you to assess space perception and room proportions accurately. This pre-visualization step helps you identify the best layout before committing. By experimenting with tape, you can see how each configuration affects the flow and balance of the room. It also reveals how much space remains for movement, ensuring your furniture doesn’t overwhelm or underwhelm the area. This method reduces guesswork and saves time.
- Evaluate how furniture fits in relation to walls and windows
- Adjust layouts to improve room proportions
- Identify potential traffic flow issues early
- Bring clarity to your design vision
Adjust for Flow
Experimenting with different furniture arrangements using tape allows you to find the most functional and visually appealing flow in your space. Move pieces around until you achieve a natural, unobstructed pathway that encourages easy movement. Consider color matching furniture and accessories to create harmony and unity, which enhances the overall flow. Keep budget considerations in mind by repurposing existing furniture or selecting affordable pieces that fit well within your layout. Use tape to test various configurations, paying attention to how people will navigate the room daily. Avoid overcrowding by leaving enough space for comfortable traffic flow, and ensure key areas like seating and work zones are easily accessible. Adjust and refine until your layout feels balanced, functional, and visually cohesive. Incorporating space planning principles can further optimize your room layout for both practicality and style. Additionally, understanding furniture placement can help you create a more inviting and efficient environment. To enhance your design process, consider visualization tools that can simulate different arrangements before making physical adjustments.
How to Pick the Best Layout for Your Space and Style?
Choosing the right layout starts with understanding your space and personal style. To do this, consider how you want to feel in the room—cozy, energetic, or relaxed. Think about your color schemes and lighting options, which set the mood and influence furniture placement. Incorporating electric bikes or similar eco-friendly transportation options can also inspire a dynamic and modern layout. Additionally, understanding the home energy setup can help optimize the placement of furniture and appliances for better functionality. Here are some tips: – Match furniture arrangements to your preferred color palette for harmony – Use lighting to highlight focal points and create visual flow – Prioritize open space if you favor minimalism – Create zones based on how you use the room, like seating or work areas
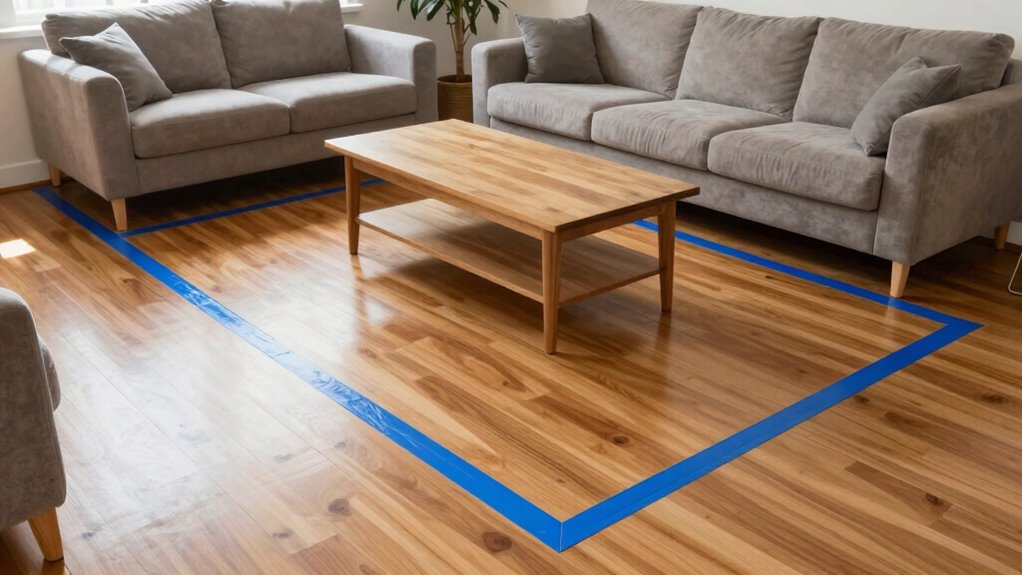
Finalize Your Furniture Placement Before Moving Heavy Items
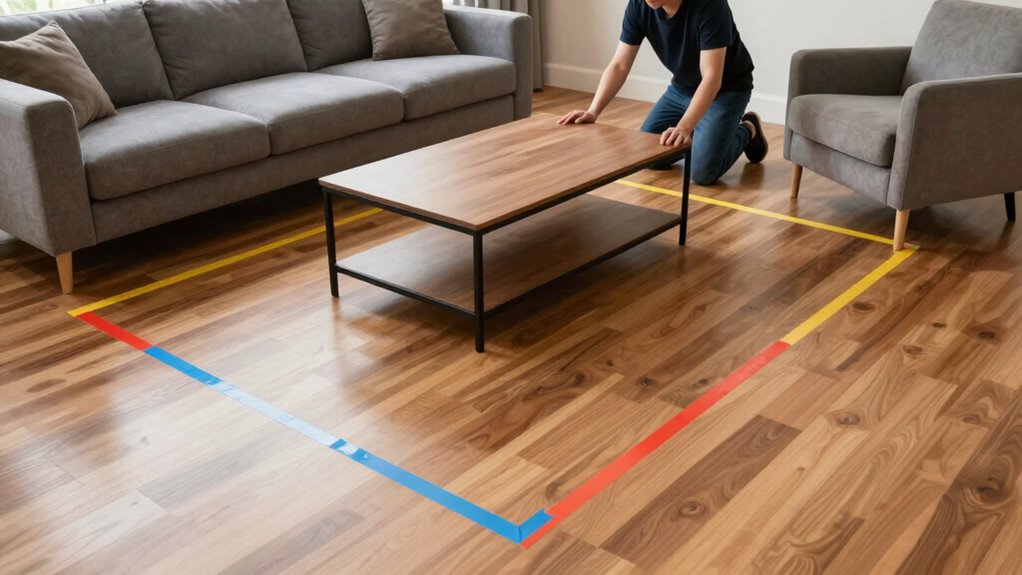
Finalizing your furniture placement before moving heavy items saves you time and effort. Use tape to outline your furniture arrangement on the floor, helping you visualize the space accurately. This step allows you to see how each piece fits and interacts with others, ensuring the layout suits your needs and style. Space visualization with tape makes it easier to spot potential issues, like traffic flow or overcrowding, before lifting a heavy sofa or table. Once you’re satisfied with the placement, you can confidently move the furniture into position, avoiding unnecessary adjustments or damage. Taking this extra step streamlines the process and ensures your room looks and functions exactly as you envisioned. It’s a simple trick that saves headaches and physical strain. Incorporating space planning techniques from interior design can further optimize your layout for comfort and efficiency, especially when considering furniture arrangement principles that maximize space utilization.
Avoid These Common Tape Planning Mistakes
Even with the best intentions, certain tape planning mistakes can undermine your furniture layout. One common error is neglecting color coordination, which can make the space feel disjointed if tape marks clash with your decor. Another mistake is ignoring lighting considerations—failing to account for natural or artificial light can result in furniture placements that don’t work well under different lighting conditions. Additionally, using inconsistent tape widths can cause confusion about scale and proportion. Ultimately, not double-checking measurements before taping can lead to misaligned furniture placements, wasting time and effort. To avoid these pitfalls, plan carefully, consider how colors and lighting will interact, and verify measurements to create a cohesive, functional layout.
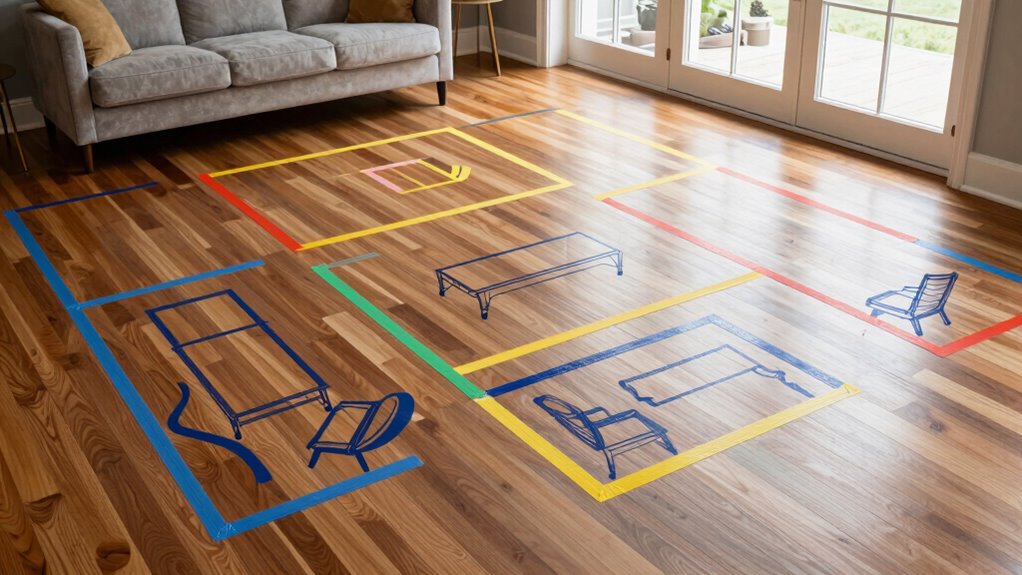
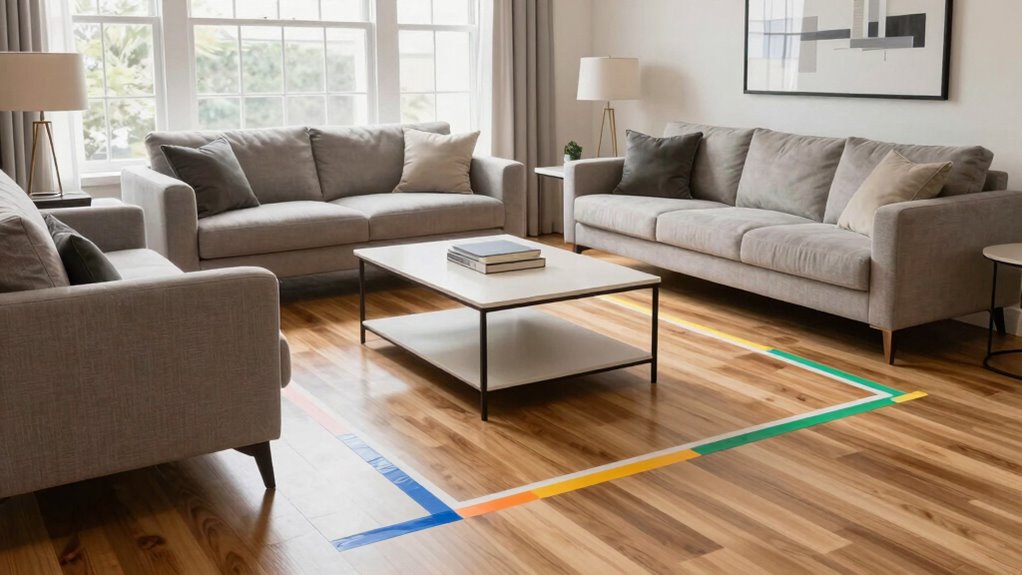
Visualize Traffic Flow and Functionality With Tape Outlines
Using tape outlines helps you map traffic patterns across your space, revealing how people will move. It’s also an effective way to test furniture placement before committing to any permanent changes. This simple step guarantees your layout promotes smooth flow and peak functionality.
Map Traffic Patterns
To effectively visualize traffic flow and identify potential bottlenecks, you can map traffic patterns using tape outlines. This method helps you see how people will move through the space and guarantees smooth room circulation. By outlining pathways, you prevent furniture arrangements that block natural traffic flow or create awkward corners. It’s a simple yet powerful way to test your layout before committing to placement. As you work, consider these key points:
- Keep main walkways clear and unobstructed
- Ensure furniture doesn’t intrude on traffic routes
- Visualize multiple pathways for flexibility
- Adjust tape outlines to optimize room circulation
This process highlights problem areas early, saving time and effort in the long run. It’s an effective tool for creating functional, well-flowing spaces.
Test Furniture Placement
Before placing furniture, visualize how it will affect traffic flow by using tape outlines. This allows you to test different arrangements without committing. Pay attention to color coordination, ensuring the tape contrasts well with the floor to clearly define space. As you outline each piece, consider lighting considerations—avoid blocking natural or artificial light sources to keep the room bright and inviting. Move the tape outlines around to see how traffic moves through the space and whether furniture placement feels natural. Adjust the outlines if needed, ensuring pathways stay unobstructed and functional. This step helps prevent congestion and awkward furniture arrangements. Using tape for testing enhances your ability to create a balanced, functional layout that harmonizes with your room’s lighting and color scheme.
Bonus Tips to Improve Your Space Planning Skills
Enhancing your space planning skills often comes down to small, strategic adjustments. Paying attention to details like color coordination and lighting considerations can make a big difference. By selecting complementary colors, you create harmony and visual flow. Proper lighting enhances the atmosphere and highlights your furniture layout. To sharpen your skills, try these tips:
- Use color swatches to plan cohesive color schemes before moving furniture.
- Experiment with different lighting options to see how they affect the space.
- Create scaled sketches or tape out furniture to visualize flow and functionality.
- Focus on balancing furniture placement with natural and artificial light sources.
These steps help you develop a sharper eye for detail and improve your overall space planning approach. Small tweaks like these can transform a good layout into a perfect one.
Frequently Asked Questions
Can Tape Planning Help in Choosing Furniture Styles?
Yes, tape planning can help you choose furniture styles by using visualization techniques to see how different pieces fit and look in your space. It allows you to experiment with layout and size, giving you a clear sense of space optimization. By visualizing furniture arrangements with tape, you can determine which styles complement your room’s dimensions and design, making it easier to select pieces that enhance your home’s overall aesthetic.
How Long Can I Leave Painter’s Tape on the Floor?
Like a timeless masterpiece, painter’s tape can stay on the floor for up to 24 hours without causing paint removal or losing tape durability. If you leave it longer, edges might lift, risking untidy lines. To keep your layout crisp, remove the tape within a day. This guarantees your design stays sharp, just like a well-executed brushstroke, without damaging your floor or compromising the tape’s hold.
Is Tape Planning Suitable for Small or Large Rooms?
Tape planning works well for both small and large rooms. In small spaces, it helps you visualize scale without clutter, making furniture placement easier. For larger rooms, tape planning allows you to experiment with different layouts before committing. Keep in mind, for bigger rooms, consider using longer tape segments to accurately reflect furniture size and scale considerations, ensuring your plan feels proportionate and functional.
Can Tape Outlines Be Removed Easily Without Residue?
You bet, those tape outlines are as easy to remove as a cat from fresh paint. With removable tape, you get residue-free removal, leaving your floors spotless and ready for the real decorating. No sticky mess or stubborn residue to scrub away. Just peel, and your space stays pristine—perfect for testing furniture placements without the hassle. It’s like magic, but with less fuss and more style!
How Do I Handle Irregularly Shaped or Angled Rooms?
When dealing with irregularly shaped or angled rooms, start by considering angle considerations to optimize space. Use painter’s tape to outline furniture placement, adapting to unique angles for precise layout planning. For irregular space solutions, measure carefully and mark key points with tape, allowing you to visualize how furniture fits best. This approach helps you navigate tricky spaces confidently, ensuring your furniture arrangement is both functional and aesthetically pleasing.
Conclusion
Did you know that homeowners who plan their furniture layouts with tape spend 30% less time rearranging later? By using painter’s tape to visualize your space first, you can confidently create a functional, balanced room. It’s a simple, cost-effective trick that saves you effort and stress. Give it a try—you might be surprised how much easier furniture arrangement becomes, and your space will look just right from the start!