
Before walls come down, focus on capturing their textures, colors, and details that tell a story. Photograph murals, graffiti, peeling paint, cracks, and structural features to preserve their character and history. Use good lighting, various angles, and close-ups to highlight textures and atmosphere. Keep an eye on surroundings for context. Learning how to frame and document these details guarantees you hold onto the essence of these walls forever—there’s more to uncover as you go along.
Key Takeaways
- Capture detailed images of unique graffiti or murals that reflect community culture and artistic expression.
- Photograph architectural features like moldings, carvings, or window frames that showcase craftsmanship.
- Take close-up shots of surface textures such as peeling paint, cracks, or weathered brick for historical context.
- Document surrounding environmental elements like signage, street art, or landmarks to provide scene context.
- Preserve wide-angle shots highlighting the wall’s overall character and its relationship with the neighborhood.
Why You Should Photograph Walls Before They Fall

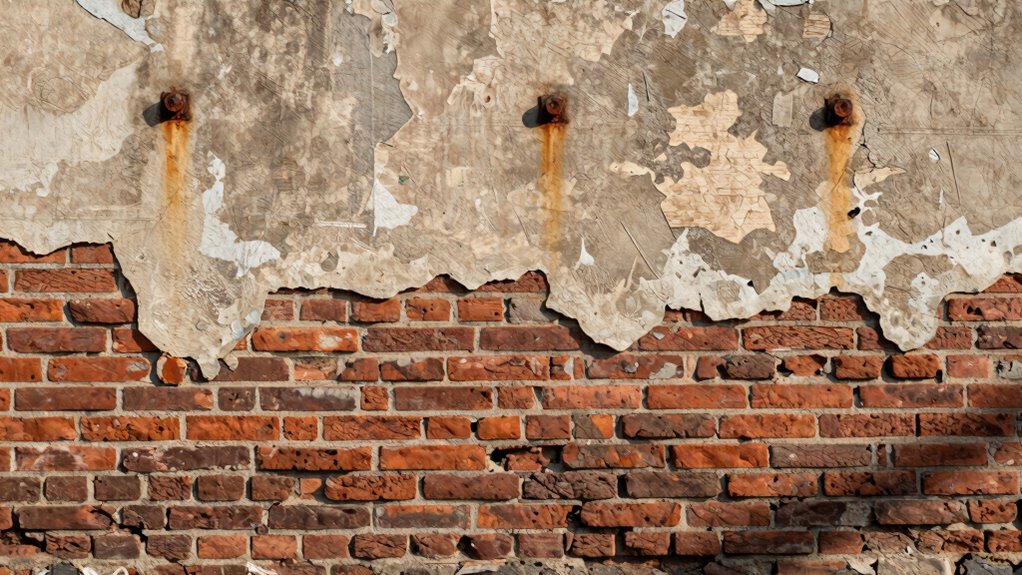
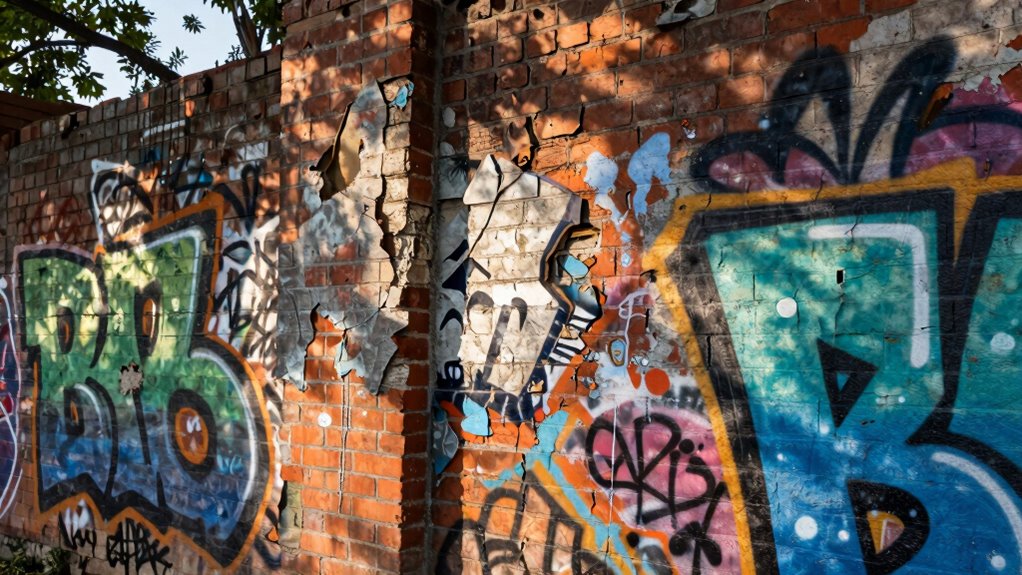
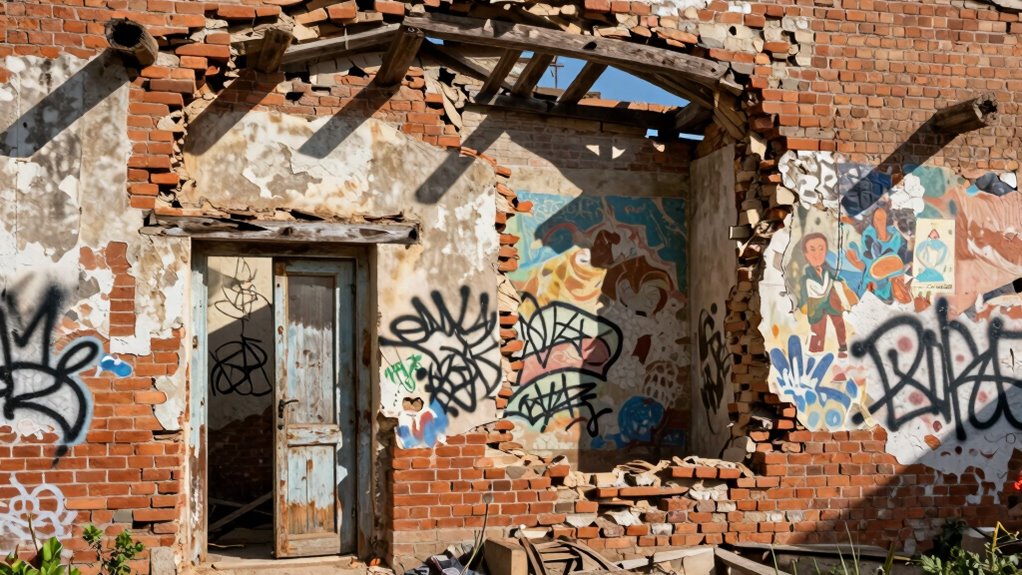
Walls hold stories, histories, and cultural significance that can disappear in an instant when they fall. Photographing these walls captures their unique color palettes, revealing the textures and hues that tell a story of time and place. These images preserve the visual essence of a space, allowing others to experience its atmosphere long after it’s gone. The historical significance embedded in each wall reflects the community’s identity, struggles, and triumphs. By documenting these surfaces, you create a visual record that honors their cultural importance. Walls are more than barriers—they’re storytellers. Once they’re gone, their stories risk being lost forever. Your photos serve as a crucial archive, ensuring that their history remains accessible and appreciated for generations. Recognizing the contrast ratio in wall textures can also enhance the visual storytelling, highlighting details that might otherwise be overlooked. Additionally, understanding the cultural context of a wall can deepen your appreciation of its significance and the stories it holds. Exploring the architectural style can further enrich your understanding of the space’s historical background and its impact on the community. Paying attention to lighting conditions can also dramatically influence the mood and detail captured in your photographs, emphasizing the textures and colors that define each wall.
Planning Your Wall Photos: Gear and Settings
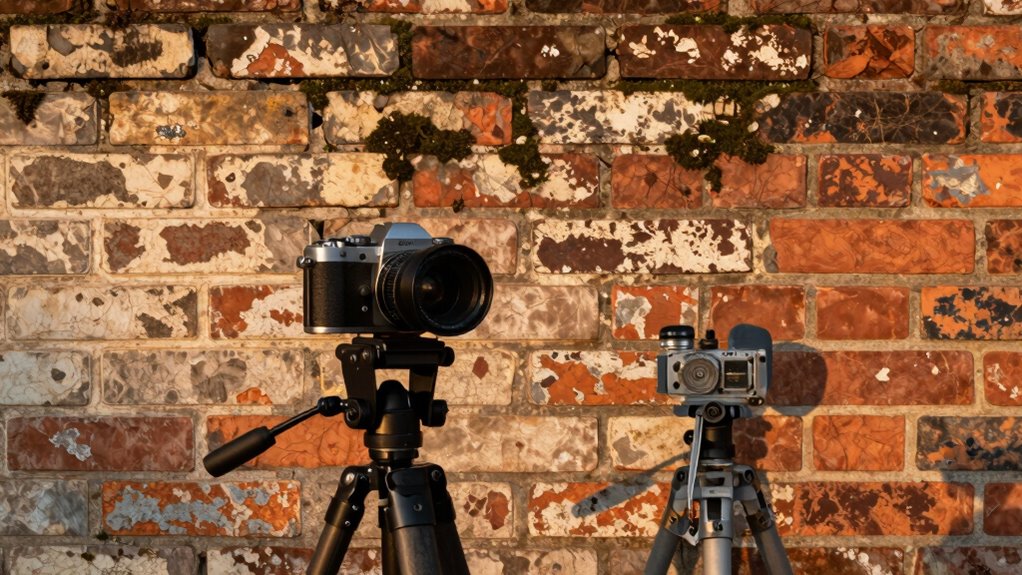
Before you start capturing images, it’s important to choose the right gear and settings to guarantee your photos truly do justice to the walls’ textures and colors. Use a camera with good resolution and consider camera accessories like a tripod to stabilize shots, especially in low light. Pay attention to lighting techniques; natural light often enhances textures, so shoot during ideal times of the day. Adjust your aperture to control depth of field, keeping details sharp from foreground to background. Use a polarizing filter if reflections or glare are an issue. Set your ISO low to minimize noise, and choose appropriate shutter speeds for clarity. These preparations help you capture the walls’ authentic character before they’re gone. Additionally, understanding your camera’s sensor capabilities can greatly improve your overall image quality. Knowing how your camera’s sensor size and dynamic range perform can help you make better exposure decisions in challenging lighting conditions.
How to Identify Key Architectural and Textural Details
To capture compelling photos before walls come down, focus on spotting unique material textures that tell a story. Look for architectural focal points that draw the eye and define the space. Pay attention to how natural light plays across surfaces, enhancing textures and highlighting details. Incorporating visual and auditory cues and understanding how light interacts with materials can help you better showcase the space’s character. Additionally, observing how textures respond to different lighting conditions can provide valuable insight into the space’s atmosphere and history. Recognizing structural details can also reveal how the space was designed and used, adding depth to your photographs. Developing a problem-solving mindset can assist in overcoming challenges when capturing fleeting moments or difficult lighting. Being aware of current trends in Gold IRA markets can also inform your understanding of the space’s historical significance and value.
Spot Unique Material Textures
Discovering unique material textures requires a keen eye for detail and a curious mindset. Look for signs of material diversity, such as aged brick, weathered wood, or rough concrete, which add character to a space. Pay close attention to surface patterns—grooves, embossing, or intricate carvings—that reveal craftsmanship and design intent. These details often stand out when light hits them at the right angle, emphasizing their uniqueness. Touch surfaces where possible to feel their texture, but always respect the space’s integrity. Notice subtle variations in color and roughness, as they can tell stories about the building’s history. Additionally, understanding material safety and proper handling methods can help you preserve these textures while documenting them authentically. Recognizing architectural details can further enhance your ability to capture a building’s character and craftsmanship. Developing an awareness of surface patterns can lead to more compelling photographs that highlight a structure’s authenticity. Moreover, being aware of building materials and their wear over time can reveal insights into construction methods and material choices. Being mindful of body piercing materials and their textures can also inspire ways to incorporate tactile details into your creative process. By honing your awareness of material diversity and surface patterns, you’ll capture compelling images that showcase the building’s authentic character before walls come down.
Highlight Architectural Focal Points
Architectural focal points naturally draw the eye and define the character of a space, so identifying these details is essential for compelling photography. Look for areas with striking color contrast, where hues sharply differ or highlight specific features. Shadow patterns also reveal depth and texture, emphasizing intricate details or unique shapes. Pay attention to elements like ornate moldings, textured brickwork, or distinctive window frames that stand out visually. These details act as visual anchors, guiding viewers through your composition. By highlighting vibrant contrasts and cast shadows, you can capture the essence of a building’s design and texture, making your photos more dynamic and engaging. Incorporating lighting techniques can further enhance the visibility of these focal points and bring out their true character. Focusing on these focal points ensures your images tell a powerful story of architectural beauty before walls come down.
Capture Natural Light Play
Natural light transforms architectural details by casting shadows, highlighting textures, and revealing hidden nuances. To capture the dynamic shadow play and striking color contrast, observe how sunlight interacts with surfaces at different times of day. Focus on key details such as:
- The way shadows outline intricate moldings or structural elements
- Areas where sunlight creates a vivid contrast between light and dark surfaces
- Textured surfaces that become more pronounced under natural light
- Changes in color warmth and hue as light shifts
- Recognizing how natural lighting enhances the depth and character of architectural features throughout the day
- Understanding how creative storytelling can emphasize the unique features captured in your photographs, making them more compelling and memorable
- Appreciating the importance of lighting conditions in bringing out the full potential of architectural photography, especially during the golden hour
- Paying attention to how visual harmony can be achieved by balancing light, shadow, and texture to create more captivating images
Additionally, observing the interplay of light and shadow can help you identify moments when natural lighting best reveals architectural beauty.
Techniques for Framing and Composing Wall Shots
To create compelling wall shots, you need to choose a perspective that highlights the wall’s most interesting features. Using leading lines can guide the viewer’s eye through your composition, while balancing elements creatively adds harmony. Mastering these techniques will help you capture powerful images before the walls come down. Additionally, being aware of passive voice can improve clarity and engagement in your writing.
Choosing the Right Perspective
Choosing the right perspective is essential for capturing compelling wall shots that tell a story or highlight details. Your perspective influences how lighting conditions and perspective angles come together to create impact. To get it right:
- Experiment with low, eye-level, and high angles to find the most dynamic view. Changing your angle can dramatically alter the visual impact of your photograph.
- Adjust your position to maximize natural or artificial lighting, reducing shadows or glare.
- Consider the distance from the wall to include or exclude certain elements.
- Use wide-angle shots for a sense of scale or close-ups for texture and detail.
- Remember that visual balance plays a key role in creating harmonious and engaging images.
Utilizing Leading Lines Effectively
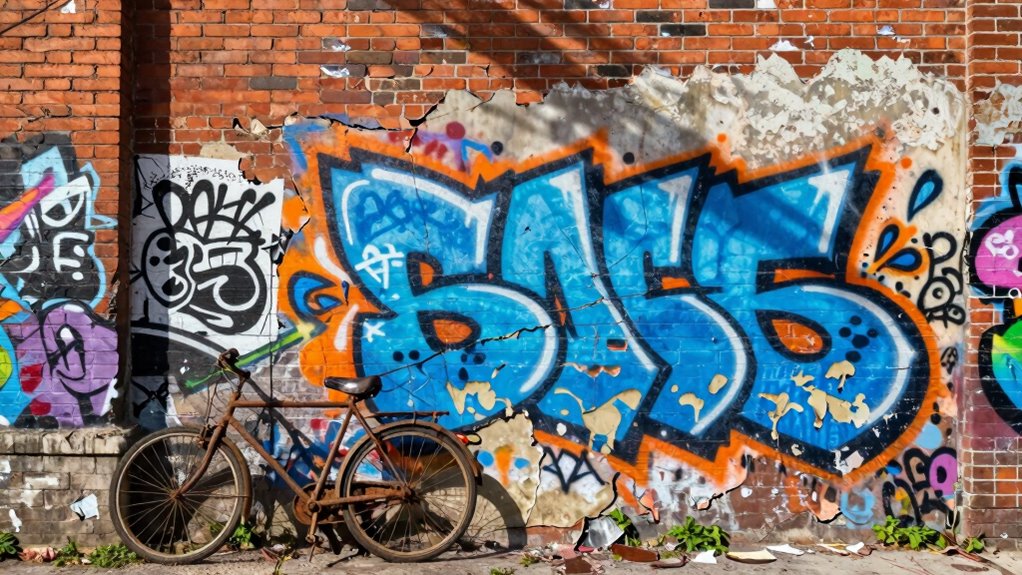
Leading lines are powerful tools for guiding viewers’ eyes through your wall shots and emphasizing the story you want to tell. Use cracked pavement, broken fences, or faded doorways to draw attention to urban decay. Incorporate graffiti art as a natural leading line, with vibrant murals or tags pointing inward or upward. Framing your shot with alley edges, rusted pipes, or archways creates visual pathways that lead viewers deeper into the scene. Imagine this:
| Element | Effect |
|---|---|
| Cracked pavement | Guides eye toward graffiti murals |
| Rusted pipes | Directs attention upward, emphasizing decay |
| Faded doorways | Frame the graffiti, adding depth |
| Broken fences | Lead line into the scene, emphasizing neglect |
| Archways | Create natural frames and pathways |
Use these lines intentionally to highlight urban decay’s raw beauty and graffiti art’s vibrant energy.
Balancing Elements Creatively
Balancing elements creatively in wall shots requires thoughtful framing and composition to guarantee all visual components work harmoniously. To achieve this, consider these techniques:
- Use color contrast to draw attention and create visual interest, juxtaposing warm and cool tones strategically.
- Layer textures to add depth, combining rough and smooth surfaces for a rich, tactile feel.
- Place focal points off-center to guide the viewer’s eye naturally across the scene.
- Incorporate framing devices like doorways or windows to segment the shot and balance visual weight.
Capturing the Texture and Atmosphere of Walls

To truly capture the character of a wall, focus on its texture and the atmosphere it creates. Notice how graffiti art adds layers of color and emotion, transforming plain surfaces into storytelling canvases. Pay attention to surface patterns—cracks, peeling paint, and weathered textures—that reveal a wall’s history and age. Use side lighting or shadows to emphasize these details, creating depth and mood. Close-ups can highlight rough textures, while wider shots showcase the overall atmosphere. Your goal is to convey the wall’s story through its visual texture and the vibe it exudes. By focusing on these elements, you’ll produce compelling images that reveal the soul behind each surface, capturing a moment before change transforms the space forever.
Common Mistakes to Avoid When Photographing Walls
One common mistake when photographing walls is ignoring the significance of lighting, which can dramatically affect the mood and details in your shots. Poor lighting can obscure textures, distort colors, or fail to highlight graffiti and wall features vital for documentation. To avoid this, keep these points in mind:
- Avoid harsh shadows that hide graffiti details or compromise wall preservation.
- Don’t shoot under inconsistent or uneven lighting, which can distort the scene.
- Steer clear of overly bright or washed-out images that lose detail.
- Remember to consider natural light versus artificial light’s impact on color accuracy and mood.
Focusing on proper lighting ensures your photos accurately represent the wall’s history and condition, indispensable for both graffiti documentation and wall preservation efforts.
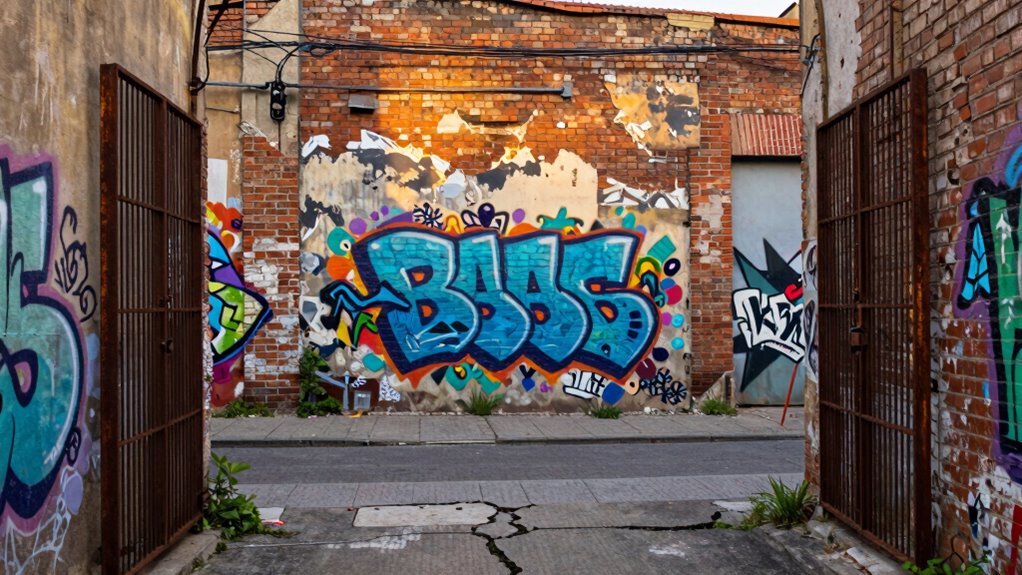
Documenting Surroundings to Contextualize Your Shots
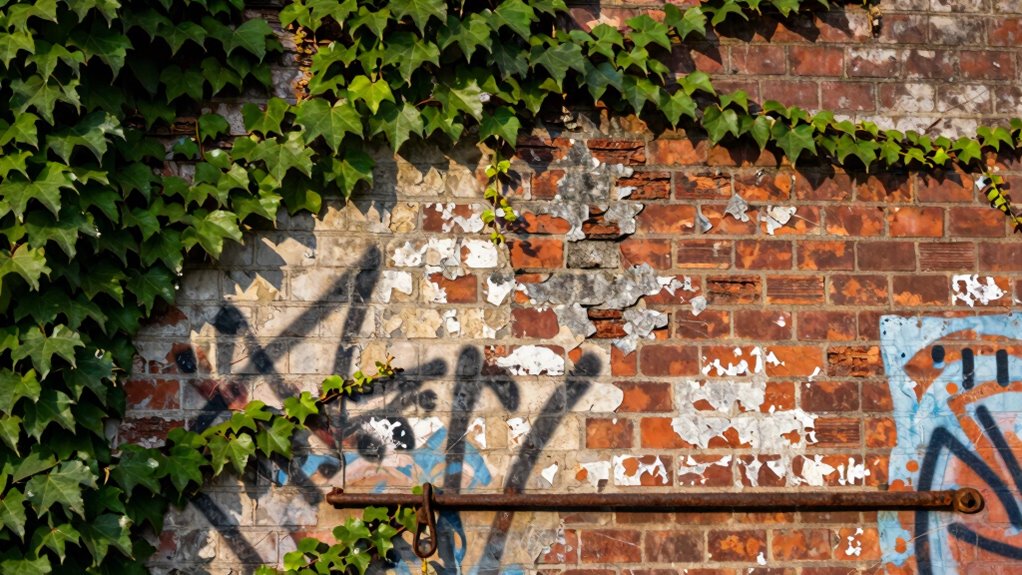
Understanding your surroundings is essential to creating compelling wall photographs, as it provides context that enhances storytelling. When you include elements of urban decay, like peeling paint or crumbling brick, you reveal the history and passage of time that shaped the wall. Recognizing the cultural significance of nearby landmarks or symbols adds depth, transforming a simple shot into a narrative about community and identity. By capturing the environment around the wall, you help viewers understand its importance and the stories it holds. Incorporate wide shots or nearby details to show how the wall interacts with its surroundings. This approach not only preserves the scene’s authenticity but also emphasizes the cultural and historical layers that make your photograph meaningful before walls inevitably come down.
Post-Processing Tips to Enhance Wall Photos

Post-processing can transform your wall photos from good to striking by emphasizing their textures, colors, and details. Start with color correction to guarantee accurate hues, making the walls’ tones pop. Next, apply noise reduction to smooth out grainy areas, especially in low-light shots. To refine your image further, consider these steps:
- Adjust brightness and contrast for depth.
- Enhance textures with clarity or structure sliders.
- Fine-tune color balance to highlight specific hues.
- Use selective sharpening to emphasize intricate details.
Telling a Story: Using Your Images to Preserve History
Capturing images of walls before they come down offers more than just visual interest; they serve as powerful stories that preserve history. Your photos become a form of cultural preservation, documenting the unique character and stories embedded in these structures. Through careful composition and thoughtful framing, you can use visual storytelling to highlight the significance of these walls—whether they symbolize community, conflict, or change. Your images can evoke emotion and provoke reflection, ensuring that even after the walls are gone, their stories endure. By focusing on details and context, you help others understand the historical importance behind the physicality. This process transforms simple photographs into meaningful records, allowing future generations to connect with the past through your visual storytelling.
Frequently Asked Questions
What Legal Considerations Should I Be Aware of When Photographing Walls?
When photographing walls, you should be aware of property rights and privacy laws. Always get permission from property owners before taking pictures, especially if the walls are inside private spaces. Respect individuals’ privacy by avoiding photos that could reveal personal information or sensitive areas. Familiarize yourself with local laws regarding photography on private property to avoid legal issues. Being cautious helps you stay compliant and respectful of others’ rights.
How Can I Photograph Walls Effectively in Low-Light Conditions?
To photograph walls effectively in low-light conditions, you should use lighting techniques like bringing a portable flashlight or using natural light from windows. Adjust your camera settings by lowering the ISO to reduce noise, opening the aperture wider for more light, and slowing shutter speed to capture more detail. A tripod can help stabilize your camera, ensuring sharp images despite longer exposures. These steps will help you capture clear, well-lit wall photos even in dim environments.
Are There Specific Times of Day Best Suited for Wall Photography?
You should aim to photograph walls during the golden hour, just after sunrise or before sunset, when the soft, warm light enhances textures and colors. Midday sunlight can create harsh shadows and washed-out details, so it’s less ideal. By shooting during the golden hour, you’ll capture more dynamic, visually appealing photos that highlight the wall’s character and depth, making your images truly stand out.
How Do I Protect My Equipment When Photographing Deteriorating Walls?
To protect your equipment when photographing deteriorating walls, always wear protective gear like gloves and sturdy clothing to prevent damage from debris. Use a camera bag with padding to shield your gear from dust and falling fragments. Consider equipment insurance to cover any accidental damage. Additionally, handle your camera carefully, avoid unstable areas, and regularly check your gear for dust or debris to keep it safe during the shoot.
Can Drone Photography Be Used to Capture Walls From Unique Angles?
Yes, drone photography allows you to explore aerial perspectives and capture walls from unique angles. You can soar above the structure, revealing details hidden from the ground and emphasizing the scale and decay. Using drone angles, you bring a fresh viewpoint that highlights the textures and deterioration, creating compelling images. Just make sure to follow safety guidelines and respect property boundaries to keep your shots stunning and legal.
Conclusion
Don’t wait until walls are gone to capture their story—you’ll regret missing the chance, like a painter without a canvas. By photographing these structures now, you preserve the textures, details, and atmosphere that tell their unique story. So pick up your camera, focus on the details, and document everything before they’re just memories. Your images will stand as a tribute, a snapshot frozen in time, waiting to be rediscovered long after the walls have fallen.