Your new floors might not match your samples because of manufacturing differences, lighting, and environmental factors that influence how colors appear. Variations in dye lots, finishes, and installation techniques can cause subtle differences. Lighting conditions and room environment also change how floors look in your space. To understand these reasons better and guarantee your expectations are met, keep exploring the details below.
Key Takeaways
- Manufacturing variations, including raw material differences and dye lots, can cause slight color discrepancies from samples.
- Lighting conditions during installation and viewing significantly influence how the floor’s color appears.
- Surface finishes and textures affect light reflection, altering perceived color compared to samples.
- Environmental factors like humidity and temperature changes can modify the floor’s appearance over time.
- Digital samples may not accurately represent the final product due to lighting, screen settings, and manufacturing tolerances.
Why Might Your New Floors Not Match the Sample You Chose?

Even if you carefully select a flooring sample, your new floors might not match it perfectly once installed. One common reason is issues with color consistency. Manufacturing processes can cause slight variations in color, especially with natural materials like hardwood or stone. These differences become more noticeable in large areas. Additionally, material matching plays a significant role. Even if the samples look identical, the batch of material used during installation might differ slightly in tone or texture. Variations in dye lots or raw material sources can affect how well the new floors blend with the sample. Variations in color consistency can also be influenced by differences in lighting conditions during installation and viewing. Understanding these factors helps set realistic expectations, as perfect replication is difficult. When planning your flooring, consider potential differences to avoid disappointment once the project is complete. Attention to detail is essential for managing expectations about material manufacturing variations. Being aware of material sourcing and production batches can help you better anticipate and accept these differences, especially when considering different production batches.
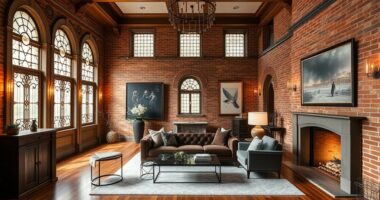
How Lighting and Environment Affect Floor Color and Appearance

Lighting can profoundly change how your floors look, making colors appear warmer or cooler depending on the light source. Environmental factors like room size, wall colors, and natural sunlight also influence the floor’s final appearance. Understanding these elements helps you see how your flooring might look different in various conditions. Additionally, lighting quality can significantly alter a floor’s perceived color and texture, impacting your overall satisfaction with your choice. Recognizing how Environmental factors such as furniture placement and window orientation affect lighting can further aid in visualizing the final look and the importance of ambient light in creating the desired atmosphere. Moreover, considering lighting temperature can help you select the most flattering and consistent color under different conditions. Being aware of these lighting effects can also help you better anticipate how your flooring will appear throughout the day.
Lighting’s Impact on Tone
The way your floors look can change dramatically depending on the lighting and environment around them. Lighting ambiance plays a vital role in how the color and tone appear, often making floors look lighter or darker. The daylight influence varies throughout the day, shifting the shade and intensity of your flooring’s hue. Different light sources, like warm or cool bulbs, can also alter the perceived tone. To understand these effects, consider:
- The type of light source and its color temperature
- How natural daylight varies throughout the day
- The intensity and angle of lighting in the room
- The overall lighting ambiance, including shadows and reflections
- Lighting design principles can help optimize how your floors look in various settings. Being mindful of these factors helps you anticipate how your floors will look in different lighting conditions, ensuring they match your expectations. Incorporating lighting effects techniques can further enhance the appearance and harmony of your flooring in any environment. Additionally, understanding lighting environments can aid in selecting the best lighting setup for your space. Recognizing the color temperature of your lighting can make a significant difference in how your flooring’s hue is perceived.
Environmental Factors Alter Appearance
Your flooring’s appearance isn’t just about the light coming into the room; the environment around it also plays a significant role. Factors like humidity, temperature, and even the surrounding colors can influence how your floors look over time. These environmental elements affect color consistency and material uniformity, making your floors appear different from samples. For example, a sample might look uniform in the store but change once installed in your space. To evoke emotion, consider this table:
| Environment Factor | Effect on Floors | Emotional Impact |
|---|---|---|
| Humidity | Warps wood, alters color | Frustration, disappointment |
| Temperature | Expands or contracts | Anxiety, concern |
| Light Exposure | Fades or enhances color | Surprise, dismay |
| Surrounding Colors | Alters perception | Confusion, dissatisfaction |
Additionally, understanding how material properties respond to environmental fluctuations can help you anticipate and mitigate these effects. Being aware of material expansion and contraction can help you select suitable flooring options that minimize these variations. Recognizing how environmental fluctuations impact your flooring can promote better long-term satisfaction and help prevent unexpected surprises. Proper installation techniques are also crucial, as they can further reduce the influence of environmental factors on your flooring’s appearance.
Why Manufacturing Variations Can Cause Color Differences

Manufacturing processes are complex, and even small variations can lead to noticeable color differences in flooring materials. These variations can affect color consistency and material uniformity, making your new floors look different from the samples. Factors such as raw material batches, dye lots, and manufacturing conditions play a role. Even slight shifts in pigmentation or finish application can result in color mismatches. To help you understand, here are key points:
- Different raw material batches may have slight hue variations
- Dye lot differences can affect the final color
- Inconsistent finishing or sealing processes impact appearance
- Manufacturing tolerances can lead to subtle but noticeable color shifts
Understanding these factors helps manage expectations and recognize why your floors might not perfectly match samples, especially considering production variability that is inherent in manufacturing processes. Additionally, variations in paint application techniques during production can further influence the final appearance of flooring materials. Being aware of these manufacturing nuances can help you better understand the potential for color discrepancies.
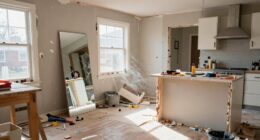
How Installation Methods and Techniques Impact Floor Look
Installation methods and techniques can substantially influence how your flooring looks once it’s installed. The way you lay the planks or tiles, along with the choice of flooring adhesives, impacts the final appearance. Different techniques, like staggered or aligned patterns, create unique visual effects. Properly applied adhesives ensure even adhesion and prevent gaps or bubbles. Here’s a visual to imagine:
| Technique | Effect on Look | Key Considerations |
|---|---|---|
| Staggered pattern | Adds visual interest | Consistent spacing |
| Straight alignment | Creates sleek, uniform appearance | Precise measurements |
| Overlapping joints | Adds texture and depth | Proper adhesive application |
Additionally, selecting the right installation technique can enhance the durability and aesthetic appeal of your flooring. Using the appropriate techniques can also help prevent uneven surfaces and extend the lifespan of your floors. Being aware of installation methods allows you to make informed choices that align with your desired outcome. Moreover, understanding the impact of techniques on the overall look can help you achieve a professional finish that matches your expectations.
Why Digital Floor Samples May Not Match the Actual Floors

Digital floor samples can look different from the actual floors you receive. Lighting conditions and display screens can change how colors appear, and material variations or manufacturing tolerances can cause discrepancies. These factors make it hard to rely solely on digital images when choosing your new floors.
Lighting Effects Impact Color
Lighting conditions can dramatically alter how floor colors appear, making digital samples seem different from the actual floors. Lighting illusions can skew your perception of the true color, especially under different lights. Natural sunlight, incandescent bulbs, and LEDs each affect how you perceive the floor’s hue. When viewing samples digitally, color perception relies heavily on screen settings, which can differ from real-world lighting.
To understand this better, consider:
- Brightness levels change how colors look
- Warm vs. cool lighting shifts hues
- Shadows create inconsistent color perceptions
- Digital images don’t replicate lighting illusions perfectly
These factors highlight why your floors might seem off from samples, emphasizing the importance of viewing samples under your actual lighting conditions before making a final decision.
Sample Material Variations
Because different materials have unique textures, finishes, and compositions, the samples you see online or in-store often don’t accurately reflect the final look of your floors. Sample consistency can vary due to factors like dye lots or manufacturing batches, which affect how similar each sample appears. Material stability also plays a role; some flooring materials change slightly over time or when exposed to environmental conditions, altering their appearance. These variations mean that the sample you examine might not match the installed floors exactly. It’s essential to recognize that even small differences in texture, gloss, or color can impact your perception. Understanding these material variations helps you set realistic expectations and avoid disappointment when your new floors are installed.
Manufacturing Tolerances Variability
Manufacturing tolerances are a key reason why your digital floor samples might not perfectly match the installed floors. Even with high manufacturing precision, small variations can occur, affecting color consistency and overall appearance. These tiny differences are unavoidable due to the limits of production processes. As a result, your real floors might look subtly different from the digital mockups or samples. Factors like material shifts during manufacturing and slight deviations in color application contribute to this variability. It’s important to understand that these tolerances are normal and expected.
- Slight color shifts due to manufacturing precision
- Variations in plank dimensions
- Differences in texture and finish
- Unavoidable minor imperfections
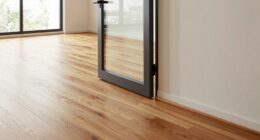
How Surface Finish and Texturing Change Floor Colors

Surface finish and texturing can considerably alter how floor colors appear, even if you’re choosing the same material or sample. The surface texture influences how light reflects off the floor, changing its perceived color. A matte finish dulls the sheen, making colors look softer and more muted. Conversely, a high-gloss finish enhances the finish sheen, intensifying colors and adding depth. Texturing, such as a brushed or embossed surface, can create shadows and variations that affect color perception.
| Surface Texture | Finish Sheen | Visual Effect |
|---|---|---|
| Smooth, polished | High-gloss | Bright, vibrant, reflective |
| Matte, dull | Low-gloss | Soft, subdued, less reflective |
| Textured, brushed | Satin or semi-gloss | Depth, subtle color variations |
| Rough, embossed | Eggshell or matte | Muted tones, tactile appeal |
Can Humidity and Temperature Alter Your Floors’ Appearance?

Fluctuations in humidity and temperature can substantially change how your floors look over time. Climate change and poor air quality can cause these fluctuations, affecting your flooring’s appearance. When air is too dry or too humid, wood and other materials expand or contract, leading to gaps, warping, or color changes. These shifts can make your floors look different from the samples you chose. To minimize these effects, monitor indoor humidity levels and keep them steady. Be aware that outdoor climate conditions will influence indoor air quality, further impacting your floors.
- Variations caused by climate change
- Changes in air quality affecting moisture levels
- Seasonal temperature swings
- Humidity fluctuations altering wood’s appearance
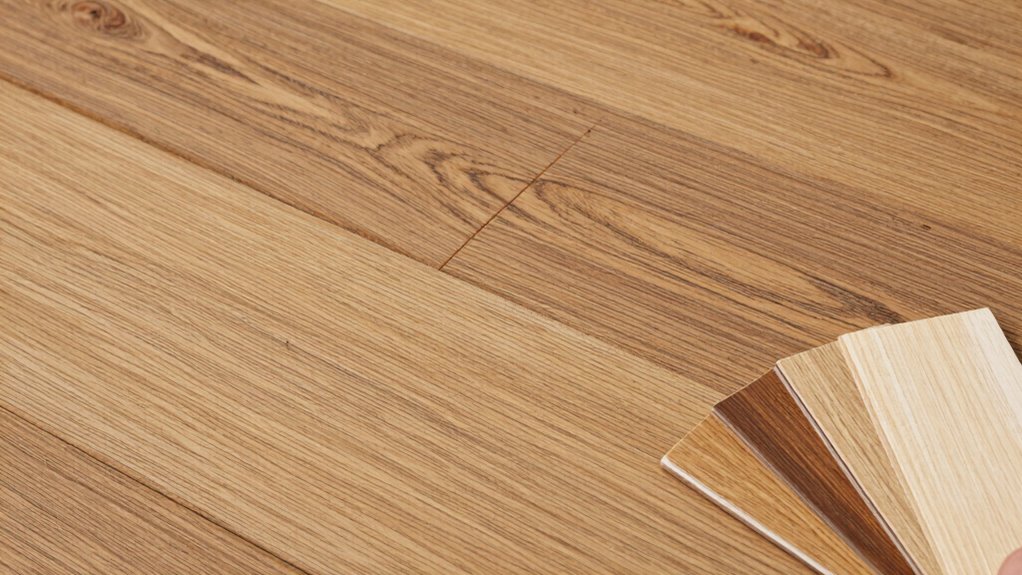
How to Verify Floor Samples Before Installation

Before installing new flooring, it’s important to verify that the samples you’ve selected accurately reflect the actual product you’ll receive. This ensures floor color consistency and helps prevent surprises. Use sample verification techniques such as examining the flooring in different lighting conditions, comparing multiple samples from the same batch, and checking for uniformity in color and pattern. Request a sample that’s representative of the entire order rather than a small piece, and inspect it carefully for any defects or variations. If possible, see how the sample looks installed in a small area of your space. Taking these steps helps confirm that the flooring will meet your expectations and match your samples closely when installed.
What to Do If Your Floors Don’t Match the Sample : Next Steps

If your floors don’t match the sample you approved, don’t panic. First, review the sample comparison carefully to identify where the differences lie, focusing on color consistency and pattern. Next, contact your flooring retailer or installer immediately to discuss your concerns. They may offer solutions like a recheck, replacement, or adjustments. Keep detailed records, including photos of the sample and the installed floor, to support your case. Consider requesting a professional assessment if needed. Communicate clearly about your expectations and ensure they understand the discrepancy. Remember, addressing these issues promptly can help prevent further problems. Stay proactive and informed—most companies aim to resolve mismatches efficiently. Your goal is a floor that matches your expectations and the sample you approved.
Frequently Asked Questions
How Long Should I Wait After Installation to See the True Color?
You should wait at least 48 to 72 hours after installation to see the true color of your flooring. During this time, the flooring color stabilizes as the material acclimates to your home’s environment. Avoid a sample comparison too soon, as lighting and moisture can cause color variations. Giving it a few days guarantees you get an accurate view of how your new floors will look long-term.
Do Different Lighting Conditions Require Different Flooring Care?
Yes, different lighting conditions do require different flooring care. Lighting variations can make your floor’s color and finish appear different, so you should adapt your maintenance routine accordingly. For example, direct sunlight might fade or discolor surfaces, so you’ll want to use UV protectants or clean regularly to maintain sample consistency. Always observe how your floors look under various lighting to ensure they stay beautiful and well-protected.
Can Cleaning Products Alter the Appearance of My New Floors?
Cleaning products can definitely alter the appearance of your new floors if you fall for cleaning myths or use products with harsh chemicals. Some cleaners might leave residues, causing dullness or streaks, while others can damage the finish. Always follow manufacturer guidelines and choose products specifically made for your flooring type. This way, you avoid negative product effects and keep your floors looking fresh and new longer.
Are There Ways to Better Match Floor Samples to Existing Decor?
You can improve sample matching by bringing your existing decor to the store for better decor coordination. Use lighting to see how samples look in your space and compare finishes and tones closely. Take photos of your current decor to match colors accurately. When selecting samples, ask for a larger swatch to see how it interacts with your decor. This proactive approach guarantees your new floors complement your home seamlessly.
How Do I Communicate Discrepancies to My Flooring Supplier Effectively?
When you notice discrepancies, start with a clear sample comparison, highlighting specific differences in color, texture, or finish. Communicate openly with your supplier by providing photos and detailed descriptions. Be concise, respectful, and focus on solutions. This approach guarantees your supplier understands your concerns and helps facilitate effective communication, making it easier to resolve issues and find the best match for your flooring needs.
Conclusion
So, before you get discouraged, remember there’s often a solution. Small adjustments or expert advice can make a big difference in achieving that perfect look. Don’t settle for less—your floors can match your vision. Curious about what steps to take next? Stay tuned, because uncovering the hidden reasons behind the mismatch might just lead you to the stunning floors you’ve been dreaming of. The secret to perfect flooring is closer than you think.